How to Make Cooking Videos: Tips for Aesthetic Short Videos
 RoboNeo TeamOctober 30, 2026
Making a great cooking short comes down to three main phases: prepping your ingredients and props, shooting the footage, and nailing the post-editing. Good lighting, camera angles, and pacing make your food look mouth-watering and keep the cooking process fun to watch. To grab the audience, a lot of creators kick things off with a close-up of the finished dish as a hook, then jump into the key steps. Whether you are figuring out how to make a short cooking video or aiming for how to make aesthetic cooking videos, these tips will help you create way more engaging content.
What Do You Need to Prepare Before Filming Cooking Videos?
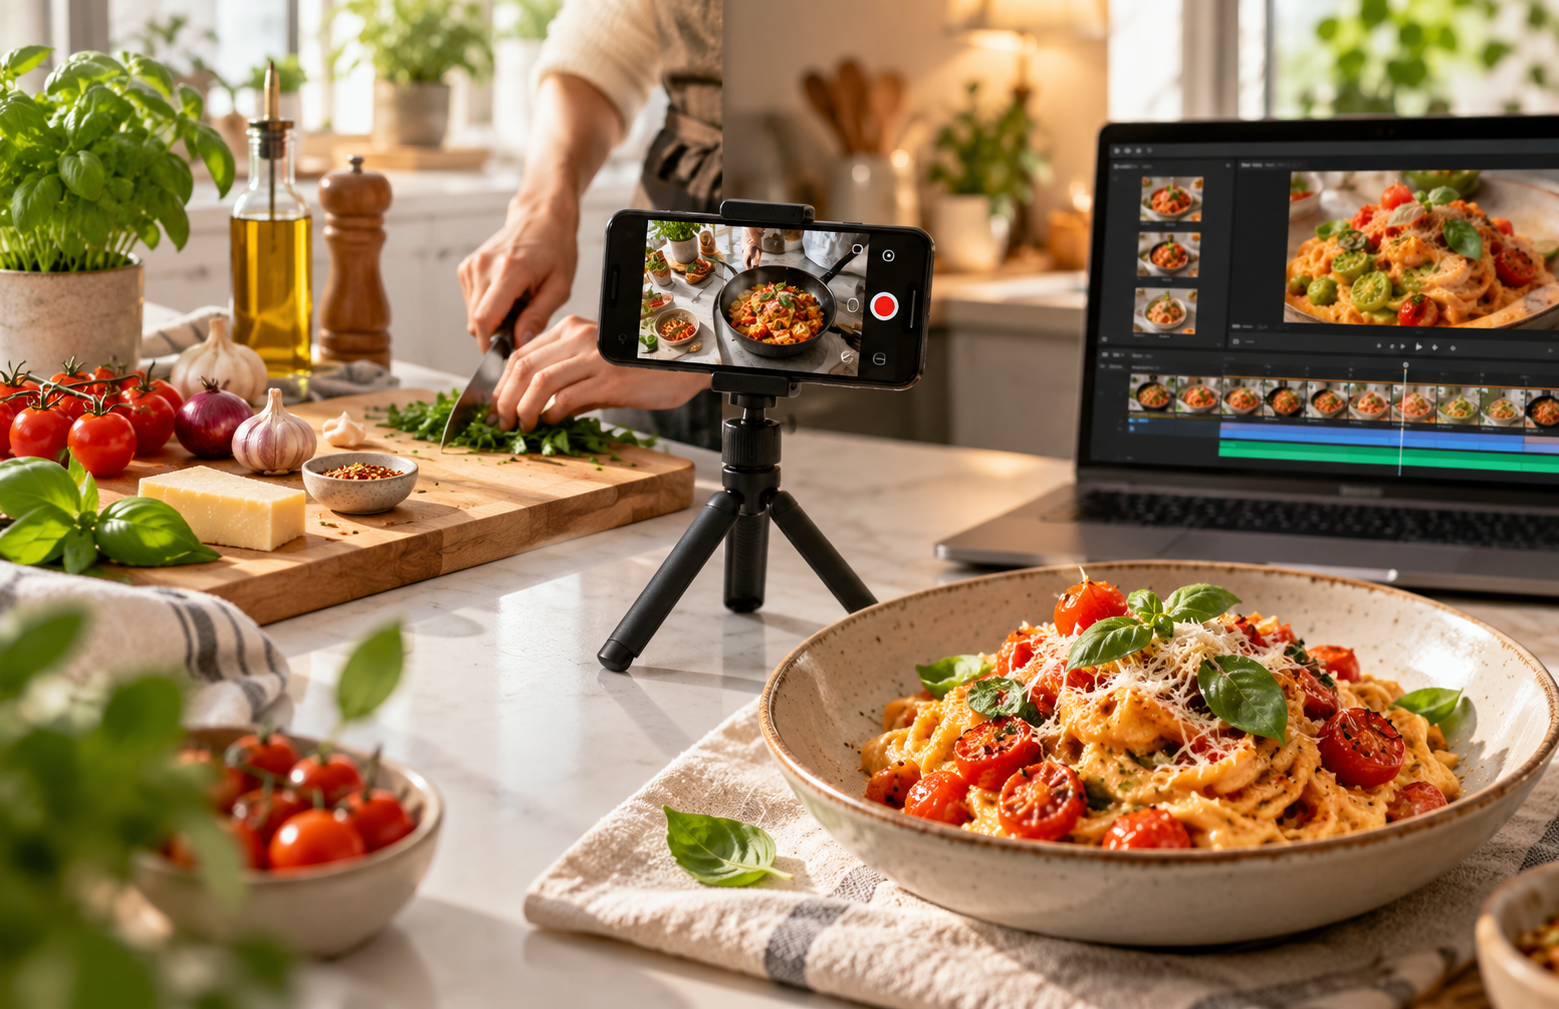
The pre-production stage plays a vital role in filming food preparation videos. Details such as lighting, camera angles, and framing have a direct impact on the overall quality of the short-form videos you create.
Essential Equipment for Cooking Videos
Before you begin, you can use the table below to check if you have the necessary equipment, which will make your upcoming shoot much easier.
| Equipment | Purpose | Priority |
| Smartphone or camera | Record cooking footage | Essential |
| Tripod or overhead mount | Keep shots stable | Recommended |
| Lighting equipment | Improve food visibility | As needed |
| Microphone | Capture cooking sounds | As needed |
| Reflector | Reduce harsh shadows | Optional |
Prepare Your Kitchen, Ingredients, and Props
Before filming, clean your kitchen counters and prep ingredients, shooting props, and cooking tools based on the recipe. Planning the ingredient layout and cooking sequence ahead of time keeps the shots looking clean and saves unnecessary filming time.
Lighting for Appetizing Food
Try shooting by a window for soft natural light, or use side lighting to bring out the texture and depth. Skip yellow ceiling lights since they cause weird colors and harsh shadows. If it's too dark, add a soft fill light to brighten the food while keeping colors natural.
Choose Your Cooking Video Style and Plan Your Shots
Once prep is done, choose your platform and video style. Tutorials need clear steps, which you can show through voiceovers or live commentary, while food-sharing videos focus more on visuals and the finished dish. If you want to make a TikTok video featuring your recipe, start with a 9:16 vertical format. A 30 to 60-second video is a practical starting point for short cooking videos, but the ideal length depends on the recipe.
How to Set Up Camera Angles and Frame Your Cooking Shots
Different angles and compositions suit different cooking steps. Knowing how to use them properly will improve your video quality.
Overhead Shots: Position your camera directly above the food facing downwards. This setup is ideal for creating clean graphic visuals, showcasing geometric patterns, or displaying an array of ingredients arranged on a table.
45-Degree Angles: This specific perspective works best for capturing the actual cooking and stir-frying process.
Close-Up Shots: These are perfect for highlighting the intricate details and textures of the food, especially once the dish is fully cooked and ready to serve.
Camera Framing and Subject Placement for Different Cooking Scenes
Here is a guide to shooting angles and composition specifically tailored for a 9:16 format.
| Cooking Scene | Camera Angle | Subject Placement | Suggested Frame Coverage |
| Ingredient display | 90° overhead | Center | 50–70% |
| Chopping and preparation | 90° overhead | Cutting board centered | 60–75% |
| Stir-frying | 30–45° | Pan in lower center | 50–65% |
| Adding seasonings | 45° side angle | Action centered | 40–60% |
| Finished dish | 45° or low angle | Food as focal point | 50–70% |
How to Film Cooking Videos Step by Step
Now that you understand the necessary equipment, props, composition, and shooting techniques, we will walk you through the step-by-step process of shooting your food video.
Open With a Hero / Finished-Dish Shot
A mouth-watering shot of the finished dish can create a strong video hook. Close-ups of dripping sauce, rising steam, or food being lifted with chopsticks can capture attention in the first few seconds and encourage viewers to keep watching.
Step 1: Prepare your recipe and ingredients.
Begin by choosing the dish you want to make and gathering the ingredients, seasonings, and cooking tools. A simple video script or shot list can help you organize the key cooking steps and plan what to capture. Keep your kitchen clean and your workspace ready before filming.
Step 2: Plan your shooting angles and equipment.
Since washing, prepping, and cooking might take place in different areas, you will need various shooting angles. Plan your equipment placement in advance and choose between overhead, side, or close-up shots based on the content, such as using overhead shots to display ingredient layouts and close-ups to record the details of chopping and frying. Always use a tripod to secure your device and minimize camera shake.
Step 3: Adjust lighting based on your environment and weather.
Good lighting can effectively highlight the color and texture of your ingredients. Prioritize soft natural light by the window and prepare a softbox for fill lighting depending on your shooting environment. Try your best to avoid harsh overhead lights and distinct shadows to ensure the food colors remain natural and the details stay clear.
Step 4: Start cooking and recording.
Once everything is ready, start cooking and filming according to your plan, making sure that all key steps and the final dish are completely captured. Pay attention to controlling ambient noise and record authentic cooking sounds like chopping and frying as much as possible. If you need a voiceover, you can record the narration separately to make post-editing much easier.
How to Edit Aesthetic Cooking Videos
Cooking is a lengthy process, and all that prep work adds up fast. Filming a single recipe can easily stretch to dozens of minutes or even longer. That’s why editing is so critical for cooking videos. It lets you pick what footage to keep, what to cut, where to speed things up, and where to slow them down. At the end of the day, editing makes or breaks a great cooking video.
Step 1: Arrange and Trim Your Cooking Clips
Sort your clips in the natural order of the cooking workflow: washing ingredients, prepping, cooking, and plating. Cut out any repeated steps, long uneventful waits, and other unnecessary footage.
Open your video with a 1–2 second close-up of the finished plated dish — think a glossy drizzle of sauce, a sprinkle of fresh garnish, or a shot of a bite being lifted. This quick hook grabs viewers’ attention right out the gate. After that, cut back to the start of prep and the cooking process. This approach keeps your video engaging from the first second while still following a clear, logical flow.
Step 2: Adjust Video Speed and Pacing
If segments of your cooking video drag on too long, viewers will lose patience and click away. Speeding up slower, low-stakes parts and only keeping key moments at regular speed is essential. It’s also one of the most effective ways to trim your video down to a tight, watchable length.
Step 3: Add Music, Captions, and Recipe Instructions
If your video uses raw on-set cooking audio or your own voiceover, be mindful of balancing the audio levels when adding background music, so neither track drowns the other out.
Captions, meanwhile, help viewers follow the recipe easily. They make it clear at a glance exactly which ingredients, seasonings, and measurements are needed for the dish.
Step 4: Create Additional Food Clips With RoboNeo
Generating supplementary clips with RoboNeo AI Clip Maker solves the issue of missing strong hooks, food close-ups, or creative shots in existing footage. Using RoboNeo strictly for visual enhancement is advised for real footage, keeping the main content authentic. Keeping AI supplementary shots between 4 and 15 seconds is recommended. Creating pet anthropomorphic cooking videos is another great way to produce engaging content. Adding labels is required for realistic AI visuals based on platform policies.
How to create a food clip with RoboNeo:
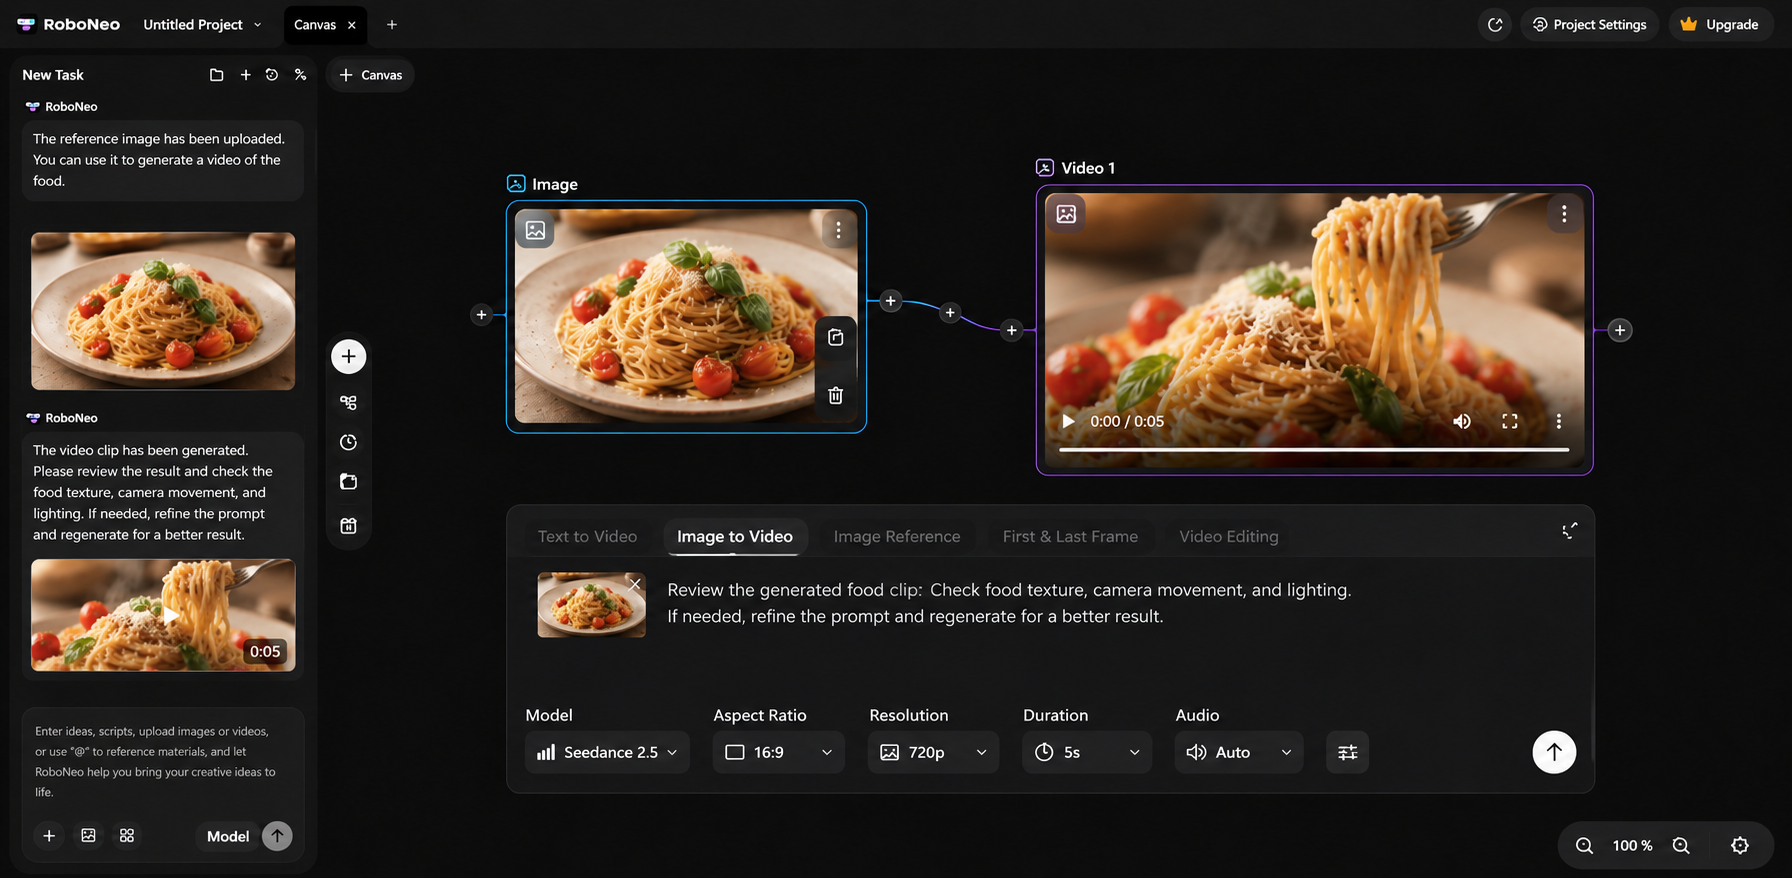
Open RoboNeo AI Clip Maker: Visit RoboNeo AI Clip Maker.
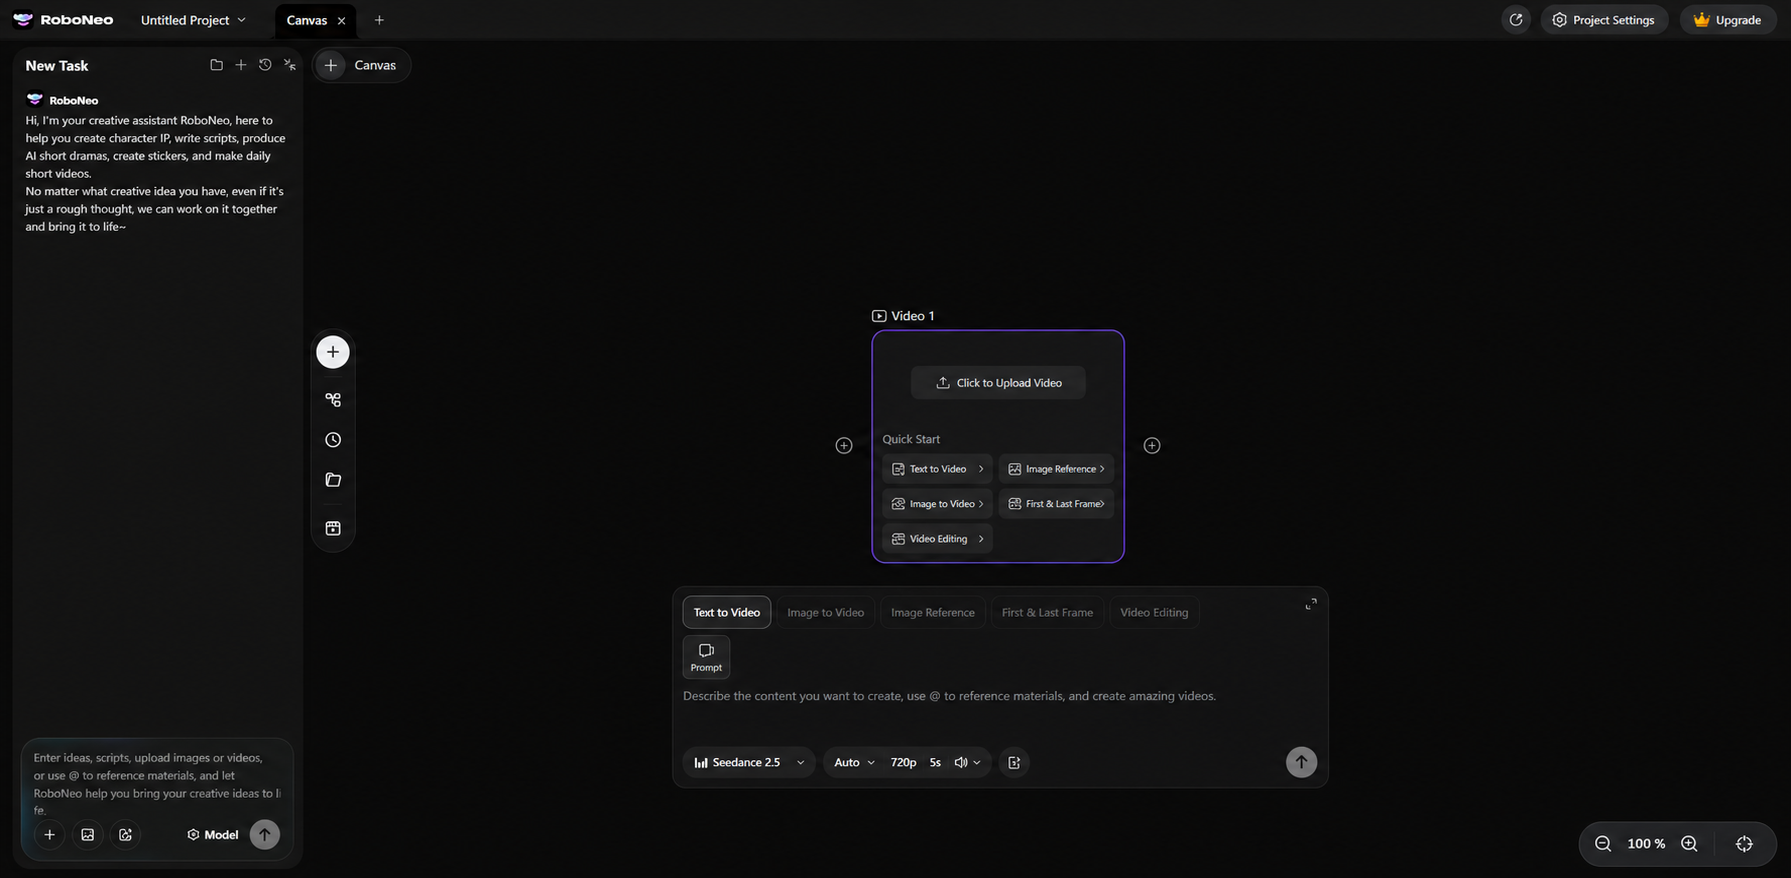
Upload a reference image and enter a prompt: Using an uploaded image of the plated food as a reference allows for generating specific shots based on your needs. For example, creating an appetizing opening close-up requires a prompt like this: "Based on the provided image, generate a 5-second opening close-up for the food video. Slowly orbit the camera around the food to emphasize texture, color, and detail for an enticing visual effect. Replace any mismatched plates or containers with more suitable tableware while maintaining food consistency. Apply soft, natural lighting and a high-end food commercial style."
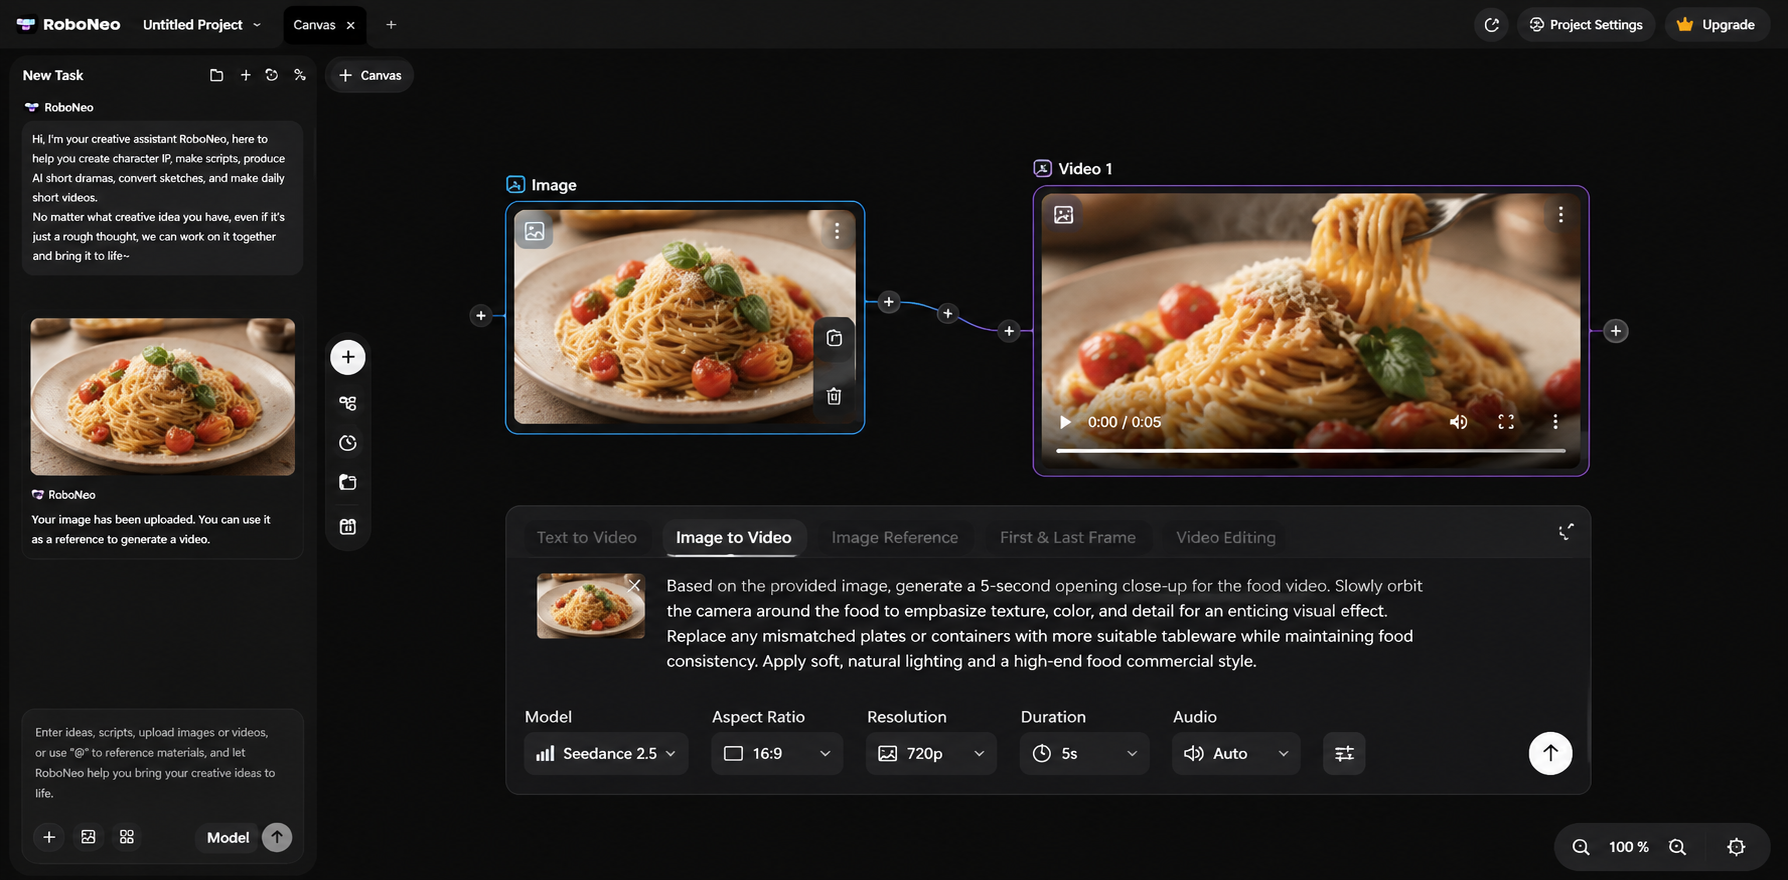
Generate and review the clip: Evaluating the generated video involves checking food details, camera movement, and lighting. Regenerating with adjusted prompts becomes necessary when the results are not ideal.
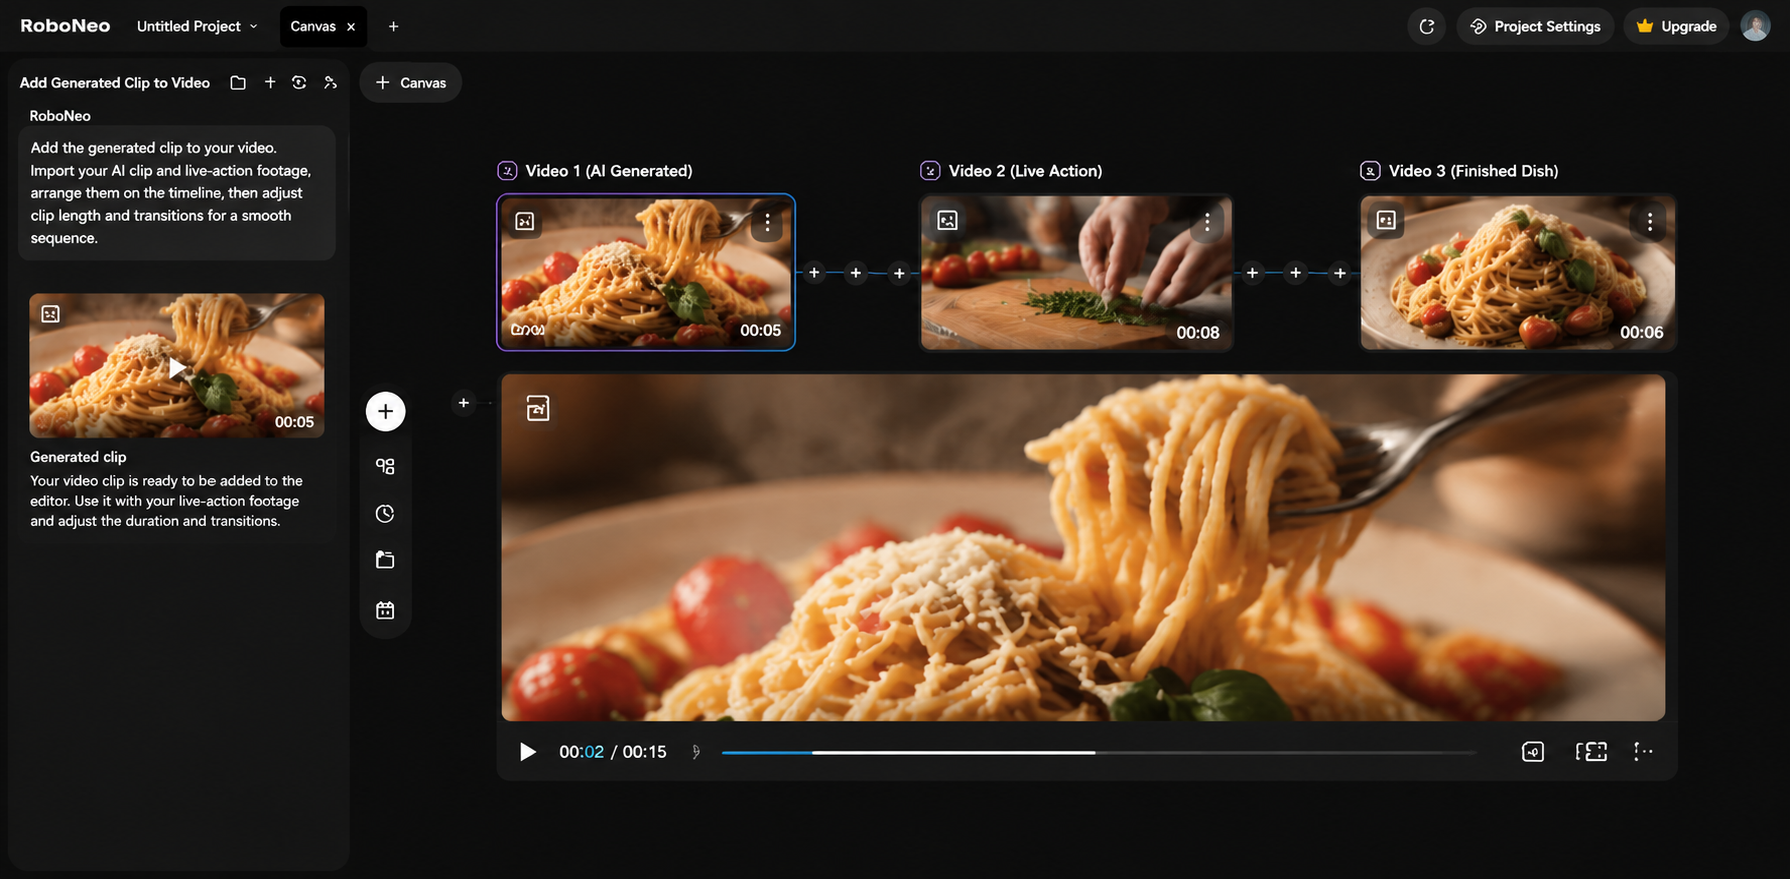
Add the clip to your video: Importing the generated clips into a video editor allows for duration and transition adjustments, ensuring a seamless blend with live-action footage.
Step 5: Resize and Export Your Cooking Video
Once you’re finished with all your editing and any AI clip tweaks, double-check that your final video fits the ideal size and format specs for the platform you’re posting to. When everything checks out, export the file and you’re all set to publish.
Tips for Making Cooking Videos Look More Aesthetic
If your finished video isn’t living up to what you had in mind, try these quick, practical tips to make it look way more polished.
Choose Food Props and Backgrounds Thoughtfully
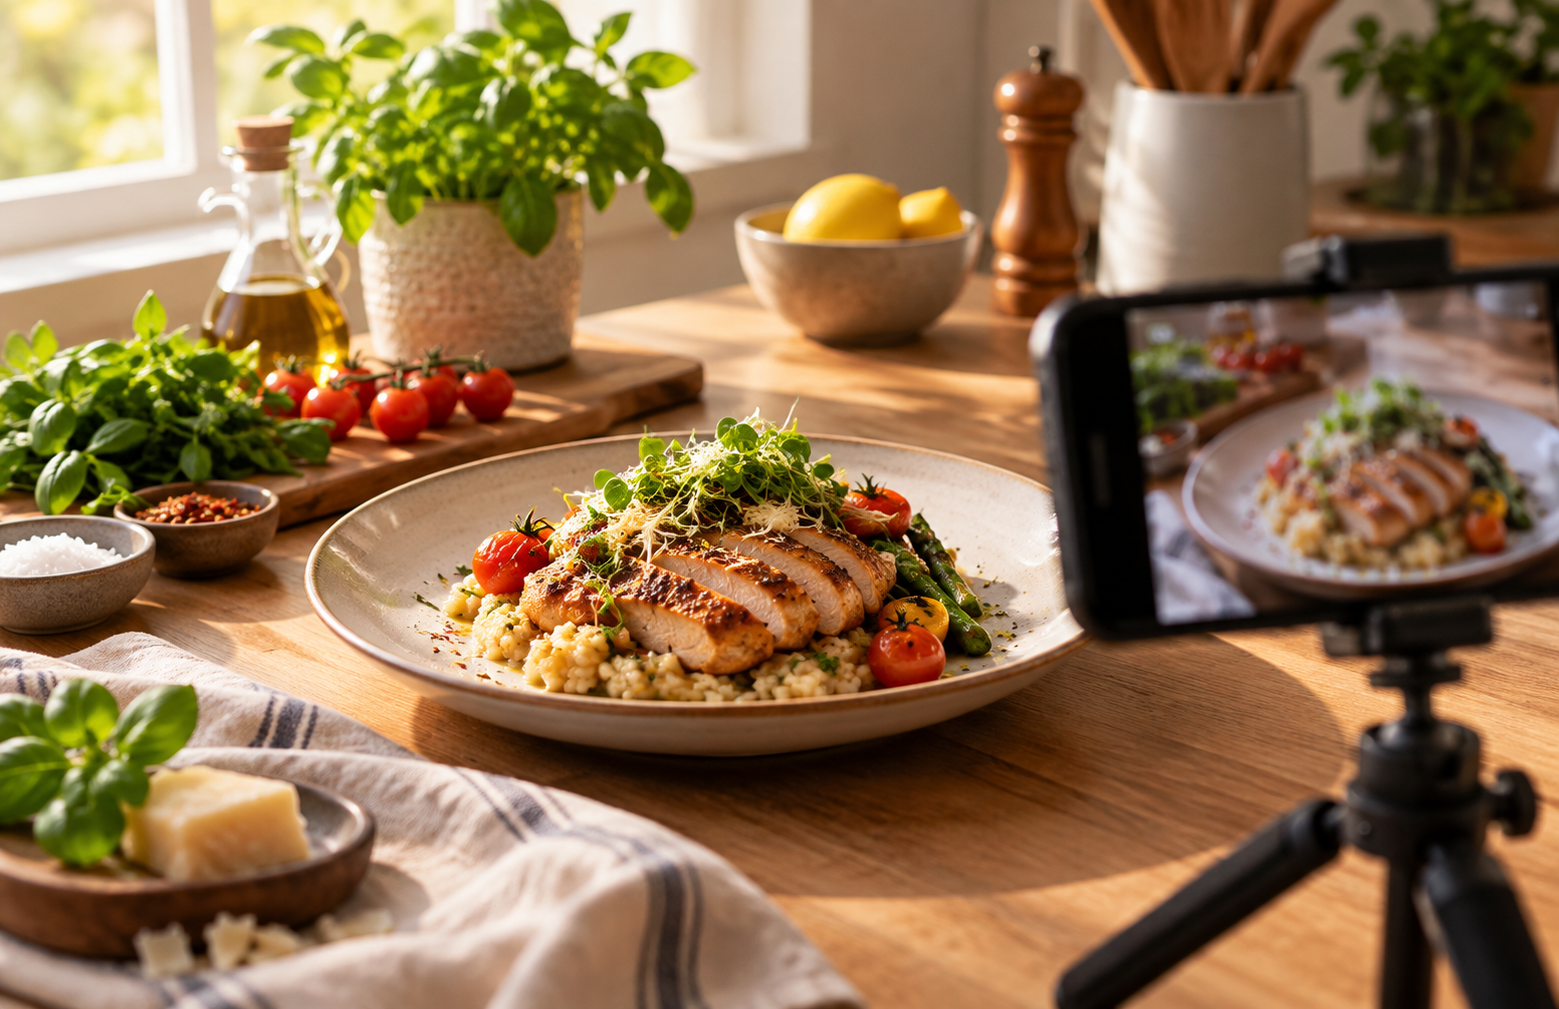
Match tableware and backgrounds to your dish's style. Light ceramic plates suit fresh salads, while dark backgrounds highlight baked goods. Props don't need to be expensive, but coordinated colors, materials, and styles significantly boost visual appeal.
Capture Clear Action Shots
Keep the camera steady and framing clear. Capture key steps like chopping, stir-frying, and seasoning. For cooking videos, it is crucial that viewers can clearly see and understand the process.
Use Satisfying Close-Ups to Highlight Food Details
Using close-up shots highlights tempting details such as soft bread interiors, melted cheese pulls, or golden chicken skin, which clearly boosts visual appeal. Maintaining sharp focus and good lighting is essential to capture the texture completely.
Keep Key Details Inside the Vertical Safe Zone
Video editing needs to account for platform interface buttons that might block the screen. Placing key visuals and captions in the safe zone effectively improves the viewing experience.
Avoid Excessive Filters and Visual Effects
Proper filters can make up for low lighting, but too many effects ruin the food's natural look. Transitions work the same way. Special effects must be applied based on actual needs to avoid an unnatural overall result.
FAQ
Do you have to show your face in cooking videos?
It’s your call. Most cooking videos work perfectly with just close-up hand shots, no face needed. AI pet cooking clips require no real person on screen at all.
How can you prevent steam from fogging up your camera lens?
Keep your camera slightly back from the steam, or use your range hood to redirect airflow away from the lens.
Can you use someone else's recipe in your cooking videos?
Stick to publicly available recipes to stay safe. If you use third-party clips, text, or music, get permission first, and make sure your video adds original value.
Do you need to label AI-generated footage in cooking videos?
It depends. Platforms like TikTok and YouTube require labels for realistic AI scenes, virtual characters, or heavily AI-edited footage. Basic AI use (captions, color grading) usually needs no disclosure.
Can you make money from short cooking videos?
Yes. You can earn via ad revenue shares or food/cookware brand sponsorships on TikTok, YouTube Shorts, and Instagram Reels. Check each platform’s official rules for full details
You May Be Interested
How Can I Make an Image High Resolution? Easy Methods
How to Make a Dark Video Brighter with AI: 5 Easy Steps
How to Make a Logo Transparent: Steps and Fixes
How to Make a Meme Video: Types, Steps, and Simple Tips
How to Make a TikTok Video in 2026: Easy Guide