
How to Brighten a Dark Picture: A Guide to Better Photo Lighting
 RoboNeo TeamAugust 25, 2026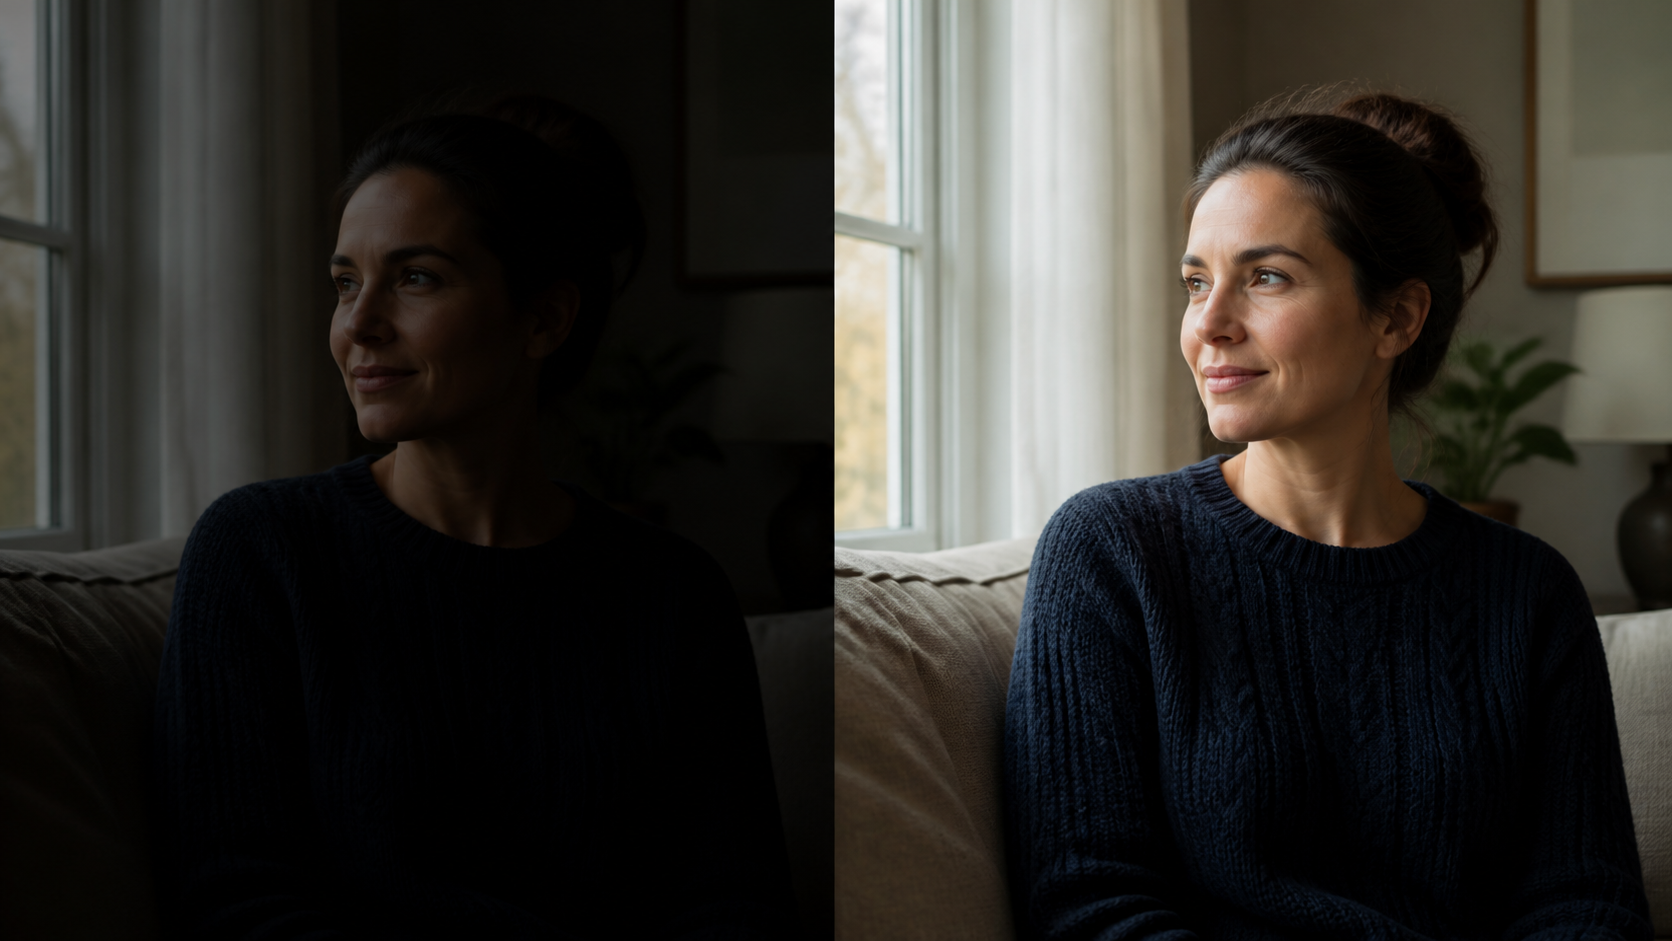
Before editing, determine whether the entire image is underexposed or only the subject and shadows are too dark. Raising exposure works when the whole picture needs more light. If the highlights already look correct but the darker areas lack detail, adjust the shadows or apply a local mask instead.
Brightening is only part of the process. Contrast, color, and shadow noise may also require correction so that the finished photo does not look flat or unnatural. Editing can reveal image data that the camera captured, but it cannot reliably recover real details from areas that have clipped to complete black. This guide explains how to identify the lighting problem, choose the right adjustment, brighten the picture step by step, and capture better-lit photos in the future.
Why Does the Picture Look Too Dark?
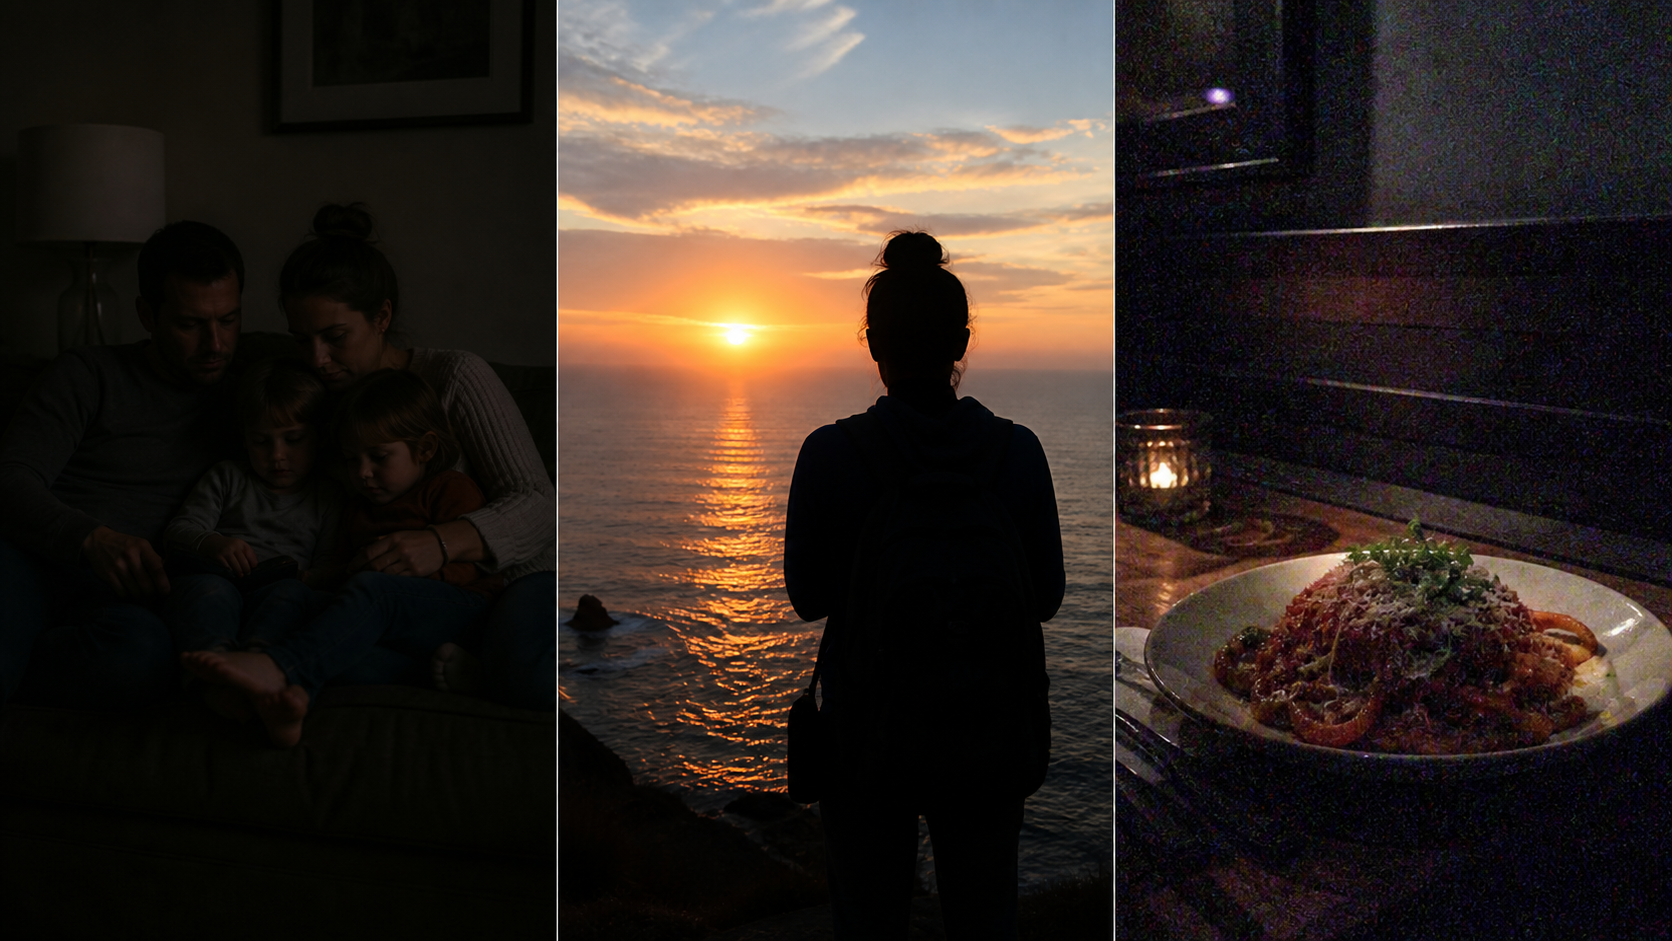
A dark picture does not always have a simple brightness problem. Identifying the cause first helps you choose an adjustment that improves the subject without damaging the rest of the image.
Overall Underexposure
Overall underexposure occurs when too little light reaches the camera sensor. The subject, midtones, and shadows all appear darker than expected, and the histogram may be concentrated toward the left.
A fast shutter speed, small aperture, low ISO setting, or dim environment can produce this result. Picture a family photo taken indoors with a fast shutter speed: the people may be sharp, but their clothes, faces, and surroundings can all look unusually dark.
These images generally need a moderate exposure increase before you refine the highlights and shadows. Avoid moving the exposure slider too far at once. A gradual adjustment makes it easier to notice when lamps, windows, or pale clothing begin losing detail.
Backlit Subjects
Backlighting creates a different problem. When a person stands in front of a bright window or sunset, the camera may preserve the bright background while leaving the face and foreground underexposed.
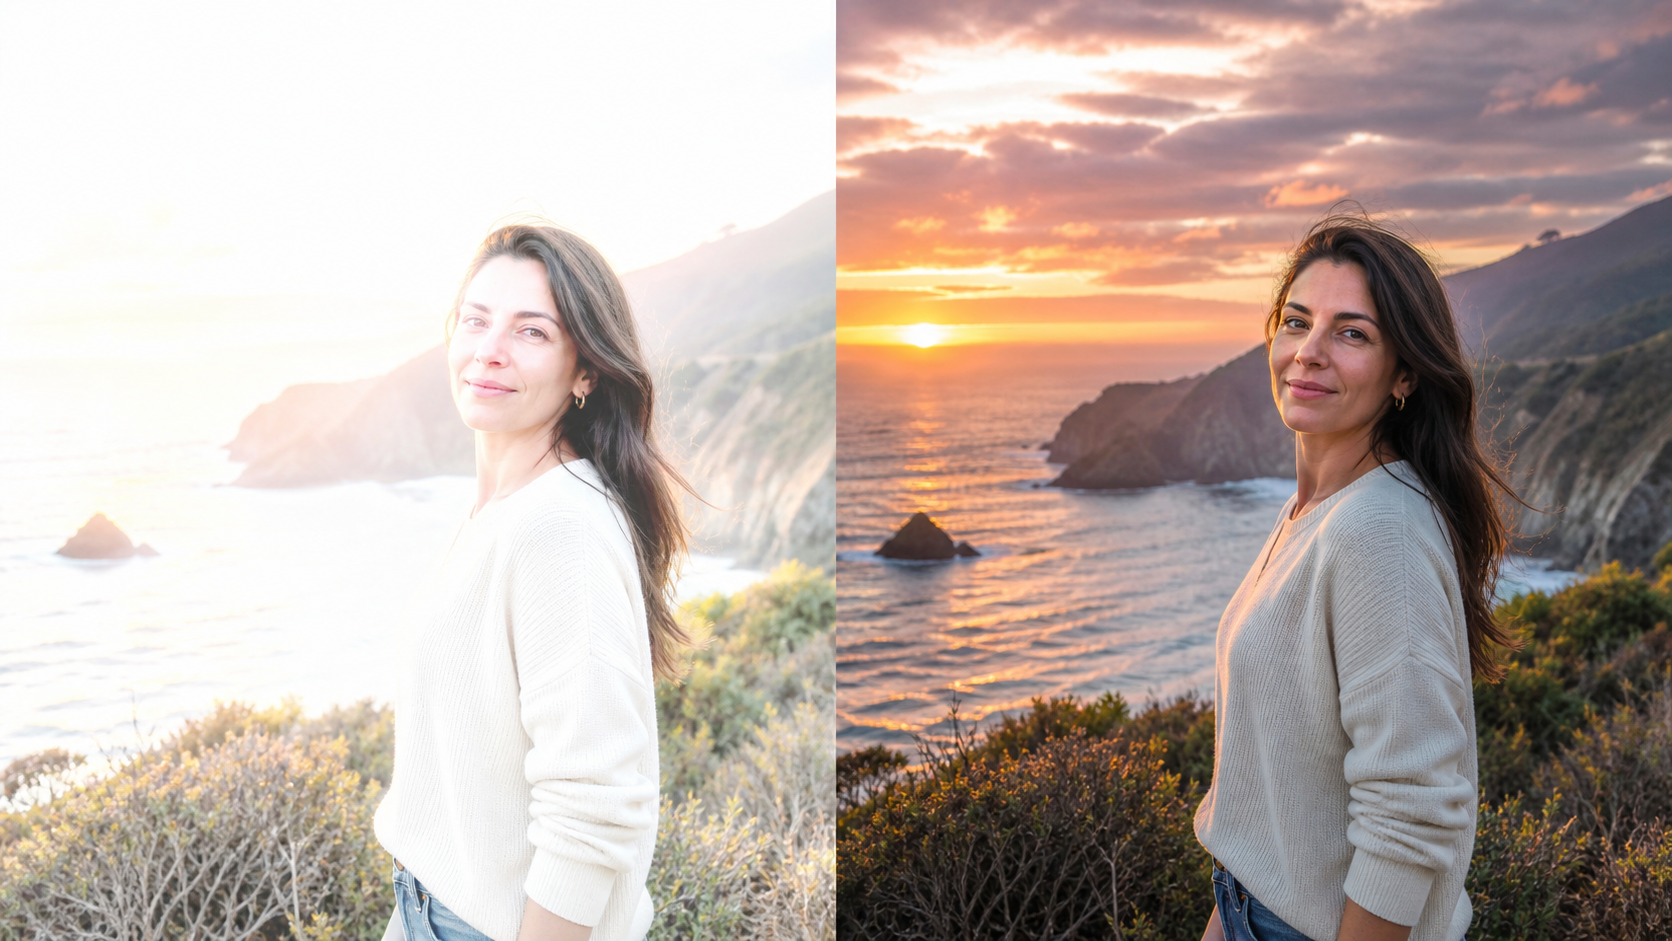
Increasing the exposure across the whole image could brighten the face, but it may also turn the sky or window into a featureless white area. In this situation, raising the shadows or selecting the subject with a local mask usually produces a more balanced result.
This approach is particularly helpful for travel portraits. A photograph taken in front of an ocean sunset may have a well-exposed sky and a nearly silhouetted person. The background does not need more light; the person does.
Low Light Noise
Photographs captured in dim conditions often contain luminance noise, colored speckles, and motion blur. Much of that damage can remain hidden while the image is dark. Once the exposure or shadows are raised, the grain becomes easier to see.
A restaurant photo taken at night may initially look smooth on a phone screen. After brightening, purple and green speckles can appear on dark walls, while fine details in hair and clothing remain soft.
For this reason, learning how to make a dark picture brighter involves more than adjusting light. The methods used to make a photo less blurry, including careful noise reduction and controlled sharpening, may also be needed during the final stage.
Choose the Right Brightening Tool
Different controls affect different tonal areas. Choosing the right one protects the parts of the photo that already look good. An AI image editor can also simplify selections, lighting corrections, and other targeted edits when manual controls feel too complicated.
| Adjustment | Best For | What It Changes | Main Advantage | Main Risk |
| Exposure | An image that is dark overall | The general exposure level | Corrects widespread underexposure quickly | Can clip highlights |
| Shadows | Dark areas with acceptable highlights | Mostly darker tonal regions | Reveals shadow detail while protecting bright areas | Can expose noise or make the image look flat |
| Brightness | Simple visual lightening | Usually midtones or perceived brightness | Easy to use for small corrections | Behavior varies between editing programs |
| Curves | Precise tonal correction | Selected shadow, midtone, and highlight ranges | Offers detailed control over contrast | Large changes can create harsh transitions |
| Local mask | A dark face, product, or foreground | Only the selected region | Preserves the surrounding background | Poor mask edges can look artificial |
The histogram offers useful guidance. Heavy clustering on the left suggests that much of the image is dark. A spike touching the far-left edge may indicate shadow clipping, although a naturally dark scene can also contain deep blacks.
How to Brighten a Dark Picture
The following workflow moves from broad corrections to smaller refinements. Most photo editors provide equivalent exposure, shadow, curve, masking, color, and noise controls even when their names differ slightly.
Step 1: Start with the Best File
A RAW file gives you the greatest chance of recovering shadow information because it stores more image data than a typical JPEG. When RAW is unavailable, use the highest-resolution original rather than a screenshot downloaded from social media. Starting with a better source is also essential when you need to make an image high resolution without magnifying compression artifacts.
Make a copy before editing or work with adjustment layers. This protects the original and allows you to revise individual changes later.
Next, inspect the histogram and the most important areas of the photograph. Decide whether the entire frame is underexposed, the shadows are too deep, or a backlit subject needs a local correction. A picture of a dark living room with a correctly exposed window requires a different approach from an outdoor photograph that is dim from corner to corner.
Step 2: Correct the Main Exposure
When the whole picture is too dark, increase exposure in small increments. Concentrate on the subject and midtones first rather than trying to make every shadow immediately visible.
Keep an eye on bright objects while making the adjustment:
White shirts should retain folds and fabric texture.
Clouds should still show shape rather than turning solid white.
Lamps and illuminated signs should not develop large blank areas.
Skin should look naturally lit rather than pale and washed out.
If those highlights were already bright before editing, stop increasing the overall exposure. Further correction should focus on shadows, curves, or selected areas. A restrained starting point leaves more room for precise adjustments later.
Step 3: Open the Shadows
The shadows control can reveal darker textures without changing the brightest areas as strongly as exposure. Raise it slowly until important shapes become visible. Trying to expose every dark corner often removes the depth that gives the photograph dimension.
Curves provide more control when a single shadow slider is not enough. Lifting the lower and middle part of the curve can brighten shadow detail and midtones, while an anchor point near the upper section helps keep the highlights stable.
Local masks work well when only one area needs attention. In a birthday photo, the cake and candles may look fine while the person behind them is too dark. A soft subject or brush mask lets you increase exposure on the face without making the candle flames excessively bright. Feathering the mask edges prevents the edited area from looking like a visible patch of light.
Step 4: Restore Color and Contrast
Opening the shadows often reduces contrast. Black areas become gray, colors lose intensity, and the photograph can develop a washed-out appearance.
A small black-point adjustment or gentle S curve can restore depth. The goal is to establish a few convincing dark tones without hiding the detail you just recovered. White balance may also need correction because shadow areas commonly reveal blue, green, or red color casts after brightening.
An indoor photo illuminated by warm lamps can become strongly orange once its exposure is raised. Moving the white balance slightly cooler may correct the scene, but a large adjustment could make skin look lifeless. Vibrance and saturation should also be used sparingly. A modest vibrance increase is often enough to restore muted clothing and background colors without exaggerating skin tones.
Step 5: Clean Up the Final Image
At 100% zoom, inspect the newly opened shadows for grain, colored speckles, blur, and compression blocks. Apply moderate noise reduction first, then add a small amount of sharpening where the subject needs clearer edges. Excessive noise reduction can make skin, hair, fabric, and walls look waxy.
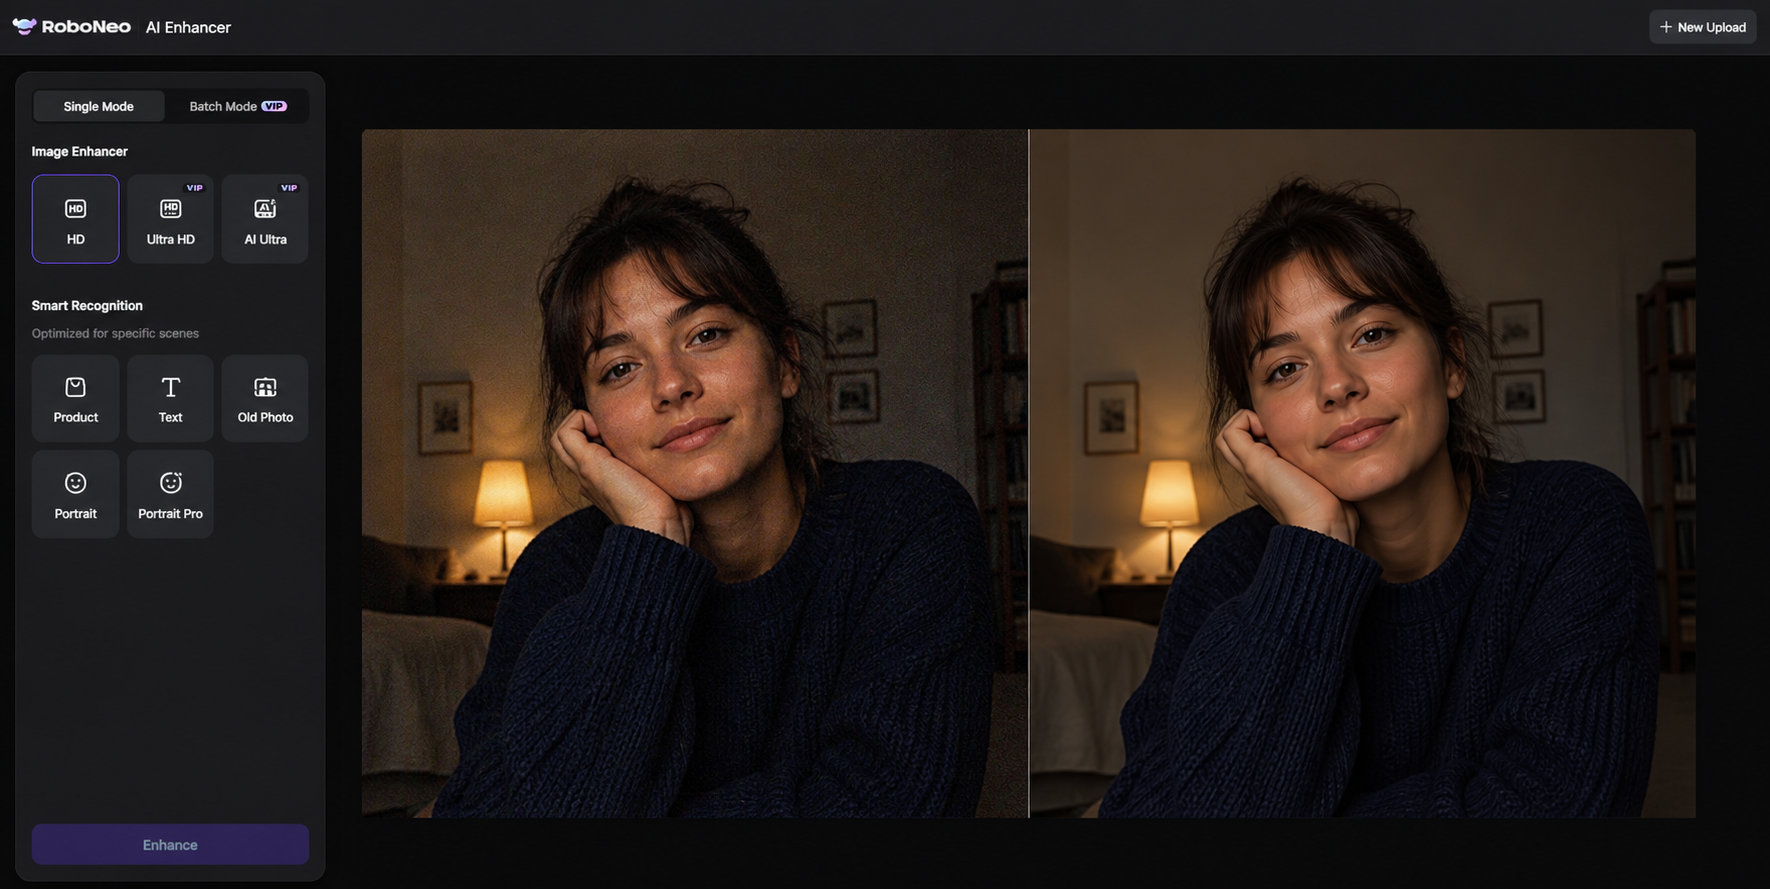
If the brightened photo still appears soft or lacks resolution, the RoboNeo AI Enhancer can be used to improve its visible clarity. After processing, check faces, text, product edges, and fine patterns closely. AI enhancement can support the final cleanup, but it cannot recover authentic content from shadow areas that were completely clipped during capture.
Compare the edited version with the original before exporting. A brighter image is not automatically a better one; the result should still match the atmosphere of the scene. Save a new copy using dimensions and compression settings appropriate for a website, social platform, or print.
Brighten Your Photos with RoboNeo
Get Better Lighting When Taking Photos
Better capture decisions reduce the amount of correction required later. The aim is to give the camera enough information while protecting important highlights.
Meter for the Subject
When photographing a person or product, meter for that subject instead of allowing a bright background to determine the entire exposure. On a phone, tapping the subject normally sets both focus and exposure. The on-screen exposure control can then be moved slightly upward or downward.
During a graduation photo outdoors, tapping the graduate's face helps prevent the camera from exposing only for the bright sky. Check both the subject and the background before taking the picture, especially in strong backlight.
Add or Redirect Light
Moving the subject closer to a window can provide more usable light without additional equipment. Indoor lamps, a reflector, or even a large white surface can redirect light into deep shadows.
Soft side lighting usually preserves facial shape and product texture more naturally than a harsh light placed directly in front. Strong light behind the subject is harder to manage unless a reflector, flash, or another fill light illuminates the front.
The arrangement matters in ordinary situations. A plate of food photographed beside a restaurant window will usually show more color and texture than the same plate placed beneath a dim ceiling light.
Capture More Image Data
RAW capture preserves greater flexibility for later exposure and white balance changes. In a static scene, a tripod also allows the camera to use a slower shutter speed and collect more light without introducing camera shake.
Handheld photography requires a balance between shutter speed and ISO. A shutter speed that is too slow may produce blur, while a very high ISO can introduce heavy noise. For a stationary evening city scene, supporting the camera and lowering the shutter speed often gives a cleaner result than dramatically increasing ISO.
High-contrast scenes can exceed the range that a camera records in one exposure. HDR or exposure bracketing captures multiple brightness levels, helping retain information in both a bright sky and a shaded foreground. The same balance between shadow recovery and highlight protection also matters when you need to make a dark video brighter.
FAQ
Can I brighten a dark photo without losing quality?
A mildly underexposed RAW photo can often be brightened while retaining good quality. Large exposure increases in a JPEG are more likely to reveal noise, compression artifacts, and color banding. Local adjustments can protect bright areas better than raising the brightness of the entire image.
Why does my photo look grainy after brightening?
Noise already present in the darker areas becomes more visible when exposure and shadows are increased. High ISO settings, low light, and severe underexposure make the effect stronger. Moderate noise reduction can help, but too much will blur skin and fine textures.
What is the difference between exposure and brightness?
Exposure generally adjusts the photograph's overall exposure level. Brightness often changes perceived lightness or emphasizes the midtones, although its behavior varies by software. Use the histogram and highlight detail to decide which control is appropriate instead of raising both aggressively.
Can I brighten only a face in a photo?
Yes. A subject mask, brush mask, or radial mask can isolate the face or person. Increasing exposure or shadows within that selection brightens the subject without changing the sky and background. Soft, feathered edges help the correction blend into the surrounding light.
Can a completely black photo be recovered?
A RAW file may reveal some shapes if the dark area still contains sensor data. When the pixels are fully clipped to black, no authentic detail remains to recover. AI may generate plausible content, but the result cannot be verified as an accurate reconstruction of the original scene.
You May Be Interested
480p vs 1080p: Which Resolution Should You Choose?

New from RoboNeo: Agent Team. The AI That Hired You a Whole Creative Squad
6 Best Ai Character Generator in 2026: Tested & Compared

How to Choose the Best AI Text to Video Generator in 2026 (+ Our Top Pick)

Best App to Remove Tiktok Watermark in 2026