How to Make a Dark Video Brighter with AI in 2026?
 RoboNeo TeamJuly 21, 2026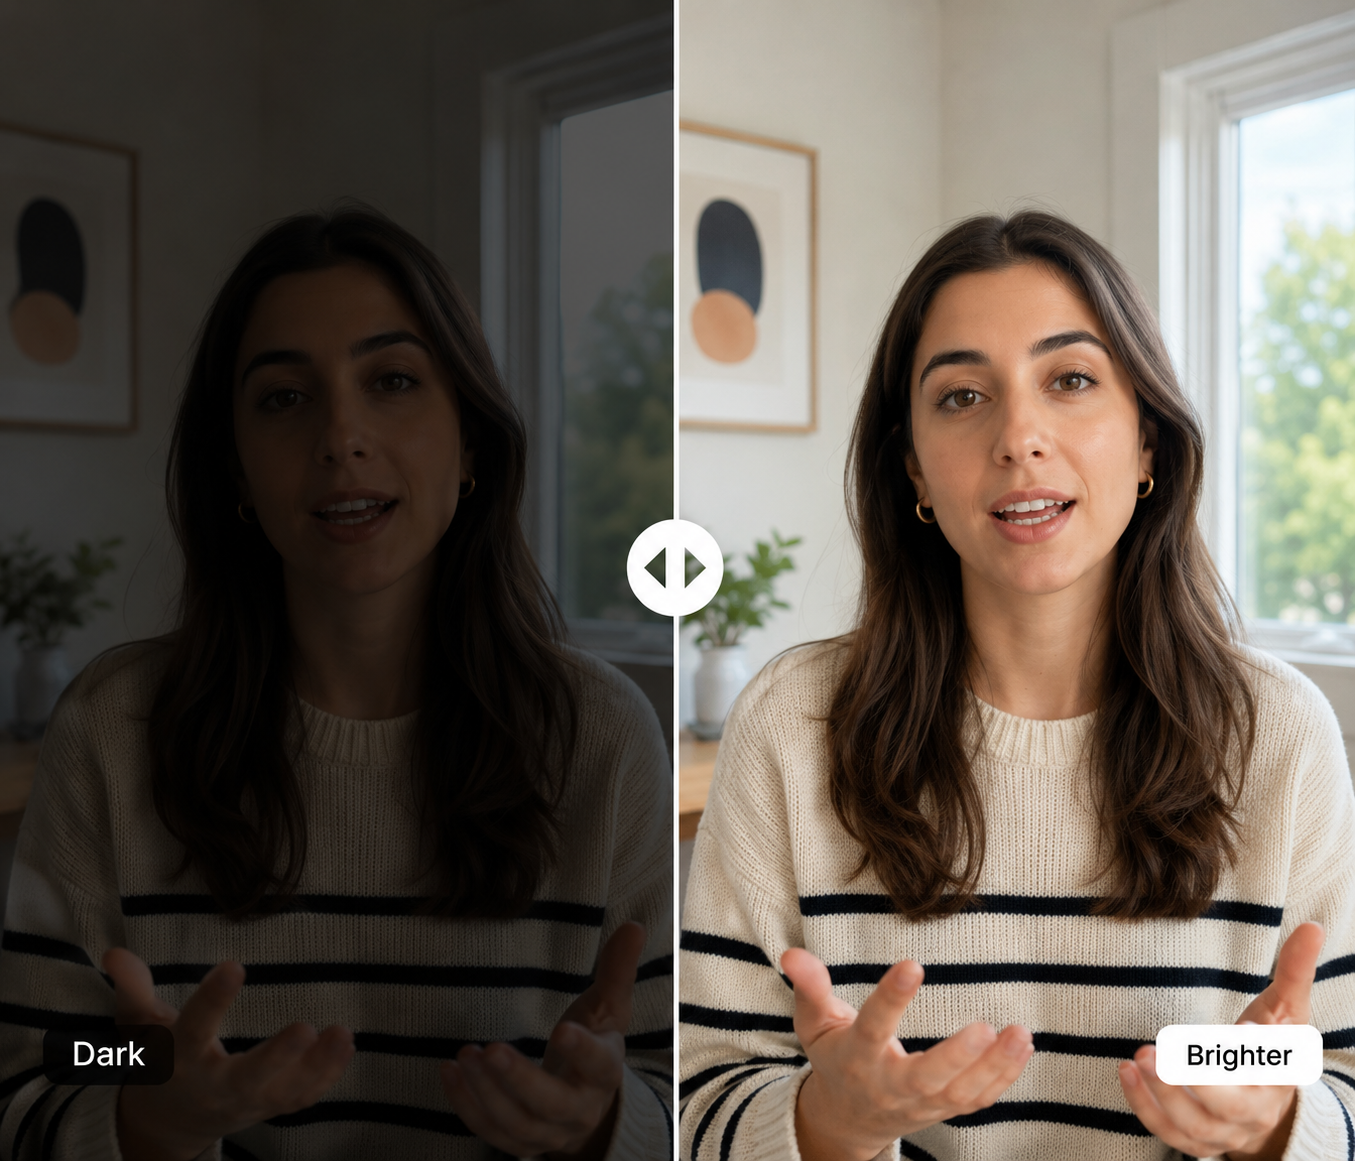
Raising brightness can help to improve dark footage, but extra adjustment can lead to noise and washed-out highlights. For anyone wondering how to make a dark video brighter, AI enhancement offers a more balanced solution. This guide walks through how to do it with AI tools in 5 simple steps:
Why Does Your Video Look Too Dark?
Several lighting and camera issues can make a video appear darker than the scene looked in person. Finding the cause helps you choose the right correction.
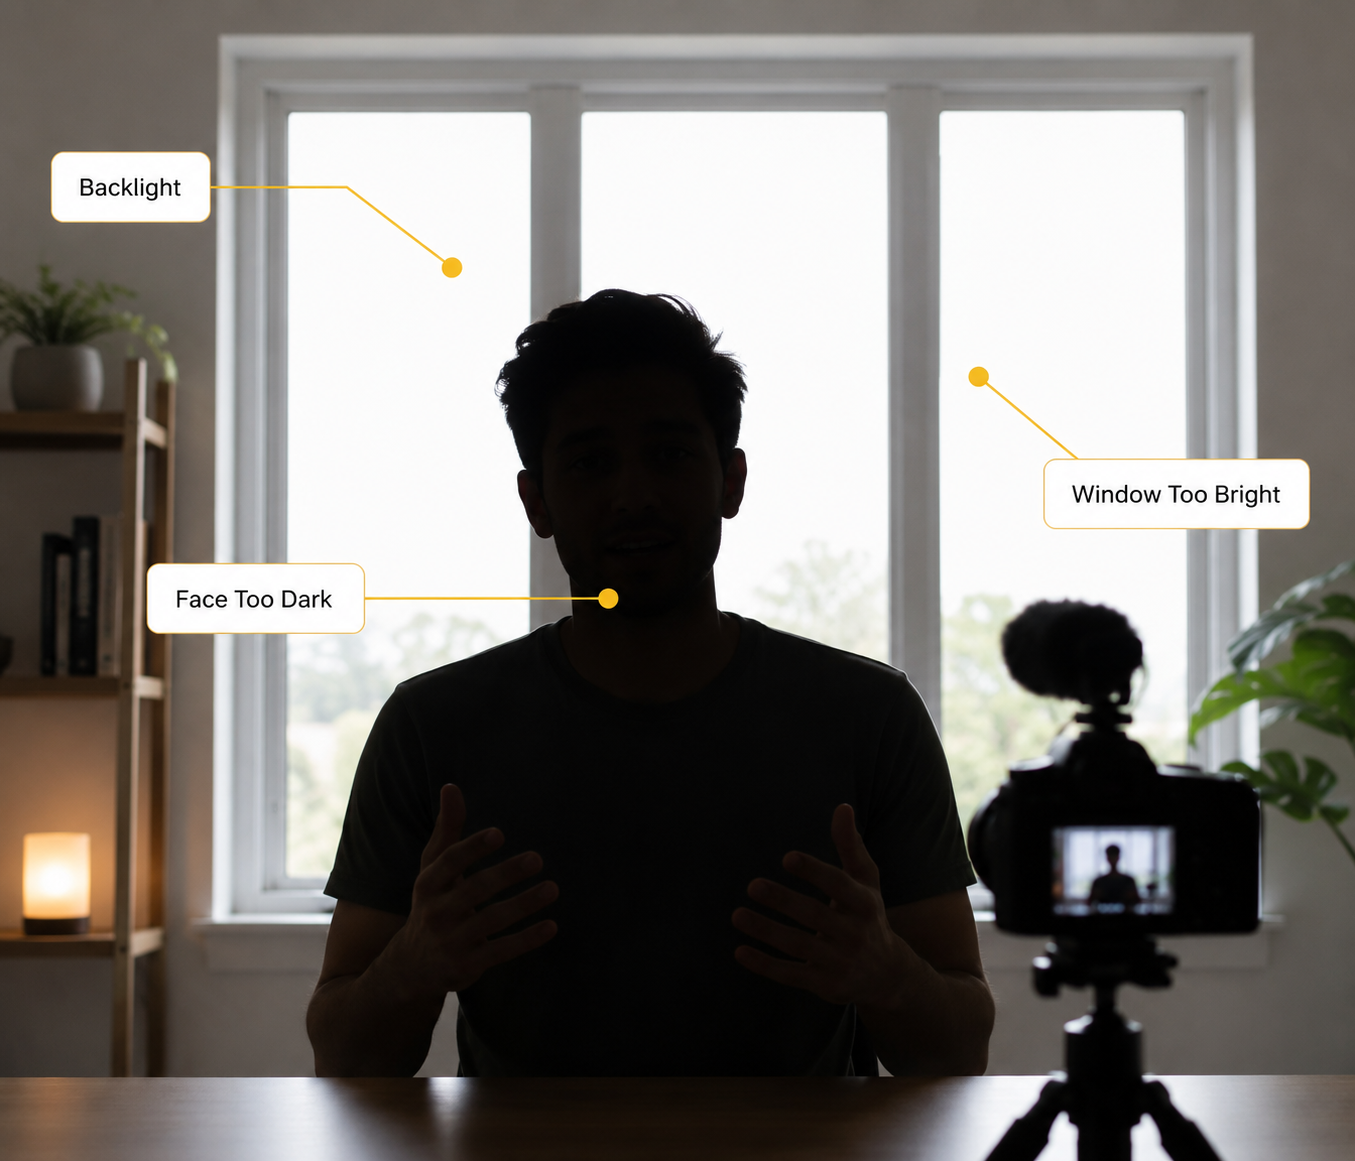
Strong backlighting often turns the subject into a silhouette. A person filming in front of a bright window may look dark because the camera exposes for the outdoor light.
Low-light environments create different problems. Phone footage from a birthday dinner may contain grain, colored speckles, and unclear shadows, even when the room seemed bright enough at the time.
Common causes include:
Weak or uneven lighting
Bright windows or lamps behind the subject
Exposure focused on the wrong area
Fast shutter speeds
Limited low-light camera performance
Heavy video compression
A backlit interview mainly needs subject brightening. Night footage may also require noise reduction and color correction.
Can AI Make a Dark Video Brighter?
AI can improve many underexposed videos when some visual information remains in the shadows. Faint outlines, colors, and textures give the tool more detail to recover.
Unlike a basic brightness adjustment, a dedicated AI video generator can process subjects, shadows, highlights, and colors separately.
What AI Can Improve
AI video enhancement can:
Brighten faces, products, and foreground subjects
Recover visible details in clothing and backgrounds
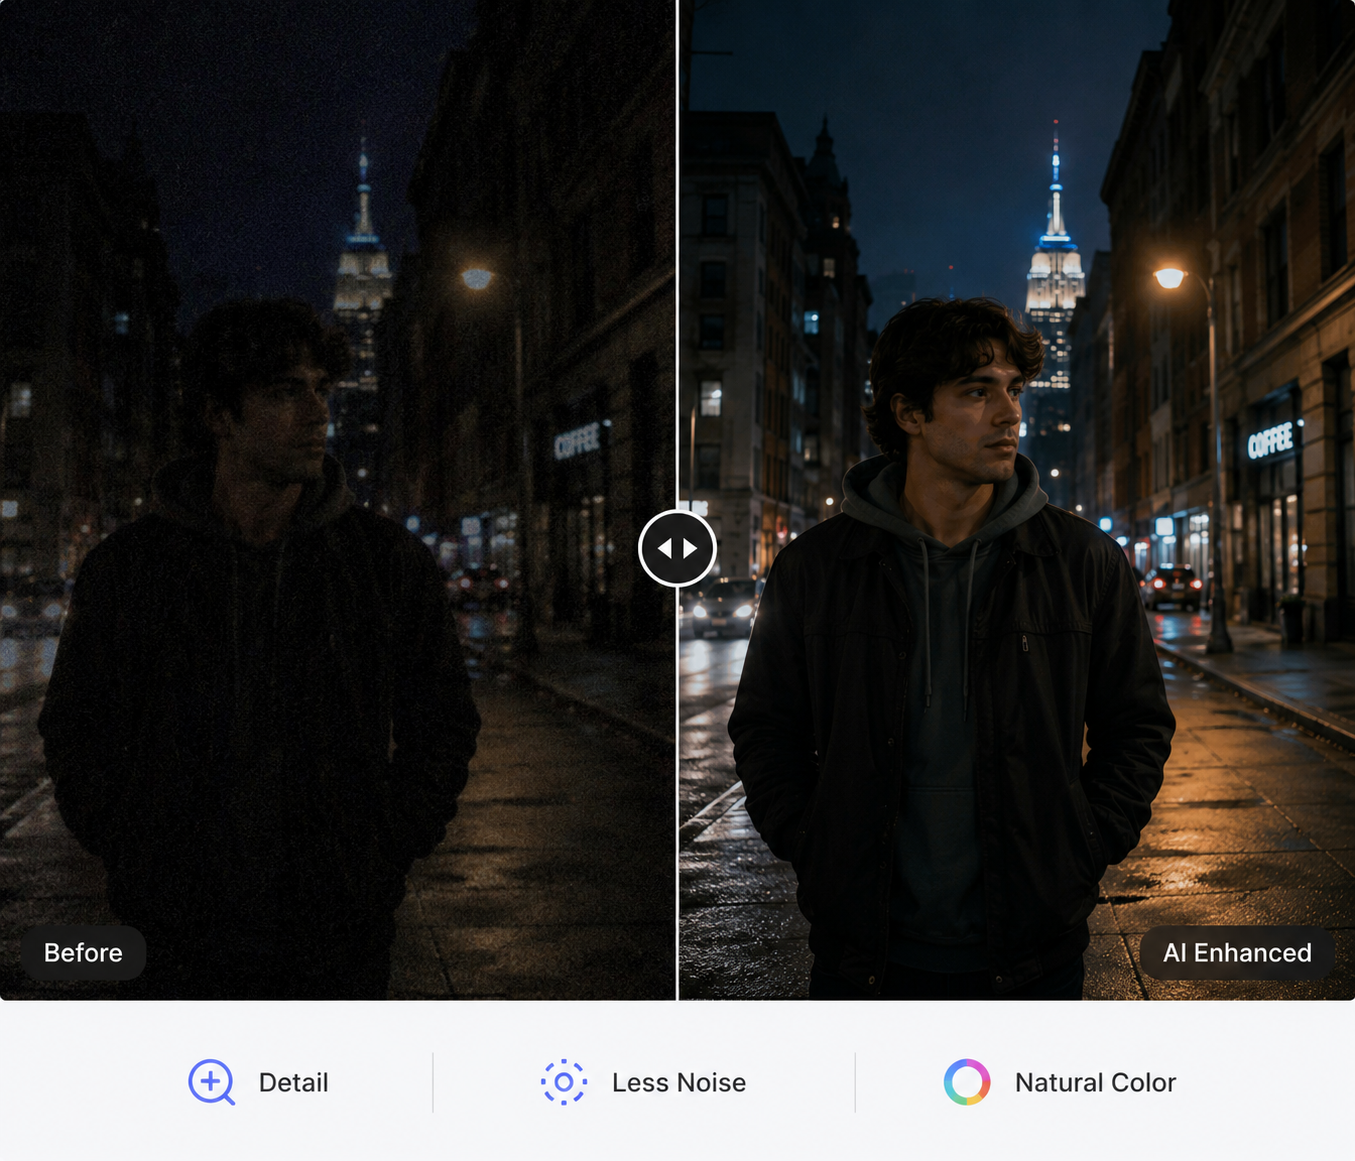
Reduce low-light brightness and color noise
Correct yellow, green, or blue color casts
Improve contrast, clarity, and color balance
Keep brightness more consistent across frames
In a product video recorded beside a window, the presenter may appear dark while the background remains clear. AI can lift the presenter without turning the window completely white. Similar to how an AI image editor adjusts complex photo exposure, video AI carefully balances the dynamic range of moving scenes.
Night scenes also need balance. A street video should reveal faces and buildings while preserving the original evening atmosphere.
What AI Cannot Fully Restore
Almost-black areas may contain little usable information. In such cases, AI may estimate textures instead of recovering the original details.
Severe motion blur, poor focus, and strong compression remain difficult to fix. A shaky concert clip can become brighter while the performers still look blurred.
How to Make a Dark Video Brighter with AI in 5 Steps
In practice, how to make a video brighter comes down to three steps: upload the original clip, describe the lighting issue, and review the result. Clear instructions help prevent unnatural colors and overexposed highlights.
Step 1: Upload Your Dark Video
The highest-quality source file provides the best starting point. Videos downloaded from social media or messaging apps may have already lost shadow detail through compression.
The RoboNeo video enhancer allows users to upload footage and describe the problem in plain language. One instruction can cover a dark face, noisy shadows, and an unwanted color cast.
For longer footage, process a short test section first. A scene containing movement, faces, shadows, and lights makes the result easier to evaluate.
Step 2: Describe the Lighting Problem
“Make the video brighter” gives the AI limited direction. A better prompt identifies the main subject, the dark areas, and the details that should remain unchanged.
Your description may cover:
The person, product, or foreground that needs brightening
Details hidden in clothing or backgrounds
Noise in shadow areas
Natural skin tones and product colors
Windows or lamps that should not become overexposed
The nighttime or indoor atmosphere you want to preserve
A concise prompt could be:
“Brighten the person and recover details in the dark clothing and background. Reduce shadow noise, maintain natural skin tones, and avoid overexposing the window.”
The intended style also matters. A nighttime travel clip should retain some darkness, while a product demonstration usually needs more even lighting.
Step 3: Apply AI Video Enhancement
During processing, the AI analyzes exposure, shadows, highlights, contrast, colors, and noise across the clip. Brightness should also remain stable between consecutive frames.
A person walking from a dim hallway into a brighter room should transition smoothly rather than flicker between exposure levels.
Dark indoor recordings may contain fan noise, echo, or quiet speech as well. These audio problems can be processed separately with RoboNeo’s voice enhancement tool.
Step 4: Preview the Brightened Video
Overall brightness is only one part of the review. Faces should retain natural skin tones, product colors need to remain accurate, and bright windows should still contain detail.
Movement may reveal flickering, glowing edges, or unstable textures. Pay close attention to hair, clothing, camera pans, and changing backgrounds.
A slightly darker result often looks more natural than an overly bright image with washed-out highlights.
Step 5: Export the Enhanced Video
The original resolution and frame rate are usually the safest export settings. Changes are only necessary when the video also needs upscaling or must meet platform requirements.
MP4 with H.264 works well for social media, websites, and general playback. A higher bitrate can preserve more detail in fast movement and dark backgrounds.
Keep the enhanced video as a separate file so the original remains available.
Tips for Recording Brighter Videos in Low Light
Better source footage gives AI more real detail to work with. A few small recording changes can reduce noise, blur, and extreme underexposure.
1. Add a Simple Key or Fill Light
A small LED panel, desk lamp, or nearby window can make the subject easier to see. Light placed slightly in front usually creates a softer result than direct overhead lighting.
During a kitchen tutorial, a lamp aimed toward the counter can reveal ingredients and hand movements without changing the natural setting.
2. Lock Exposure on the Main Subject
Phones may change exposure when screens, lamps, or windows enter the frame. Exposure lock keeps the main subject at a more consistent brightness.
In a computer tutorial, a bright monitor can make the presenter’s face look darker. Locking exposure on the face prevents this constant adjustment.
3. Keep the Camera Stable
Camera shake becomes more visible in low light because slower shutter speeds may be used. A tripod, phone stand, shelf, or stable table can improve clarity.
Stable footage also gives AI cleaner frames to analyze, reducing motion artifacts after enhancement.
FAQ
Can AI brighten a video that is almost completely black?
AI can make the frame lighter, but it cannot reliably recover details that were never captured. Better results are possible when faint outlines, colors, or facial features remain visible.
Can AI fix dark videos recorded on a phone?
Yes. AI can improve phone footage affected by backlighting, shadows, noise, and color casts. The original camera file usually produces better results than a compressed copy.
Should I adjust exposure or brightness first?
Exposure is more useful when the entire video is underexposed. Brightness works better for smaller overall changes, followed by adjustments to shadows, highlights, and noise.
What Is the Best Format for Exporting a Brightened Video?
MP4 with H.264 offers broad compatibility and manageable file sizes. Keep the original resolution and frame rate unless the publishing platform requires different settings.
Can AI Color Correct a Video?
Yes. AI can reduce color casts, improve skin tones, and create more consistent colors between shots. Manual review is still necessary when accurate product colors or intentional lighting matter.
You May Be Interested
How to Use an AI Video Generator Online to Create Viral Content
How to Create Stunning Visuals with the Best AI Music Video Generator
Best Free Tools to Remove Watermark from Video 2026
Character AI Alternative: Better AI Chat Tools
How to Use Agent Teams on RoboNeo: From One Prompt to a Full Creative Pipeline