How to Make a Green Screen Video: Prompting and Generation Tips
 RoboNeo TeamOctober 30, 2026
An AI-generated green screen clip can look convincing at first glance but fall apart when you try to key it. The green may shift across the frame, shadows may cling to the subject, or hair and hands may dissolve into rough edges. A cleaner result starts before editing, with a focused prompt that treats the background, framing, action, and camera as separate instructions.
Below, you will learn how to structure a green screen video prompt, generate the clip in RoboNeo, and reduce motion blur, color spill, and edge artifacts. The workflow is designed for beginners who want footage that is easier to composite in CapCut or another chroma key editor.
How to Write a Prompt for a Green Screen Video
An effective text-to-video prompt gives the video model one unambiguous job. Define the background, shot, subject action, and camera behavior in plain language, then remove details that could introduce extra scenery or conflicting movement.
Keep the Green Background Even
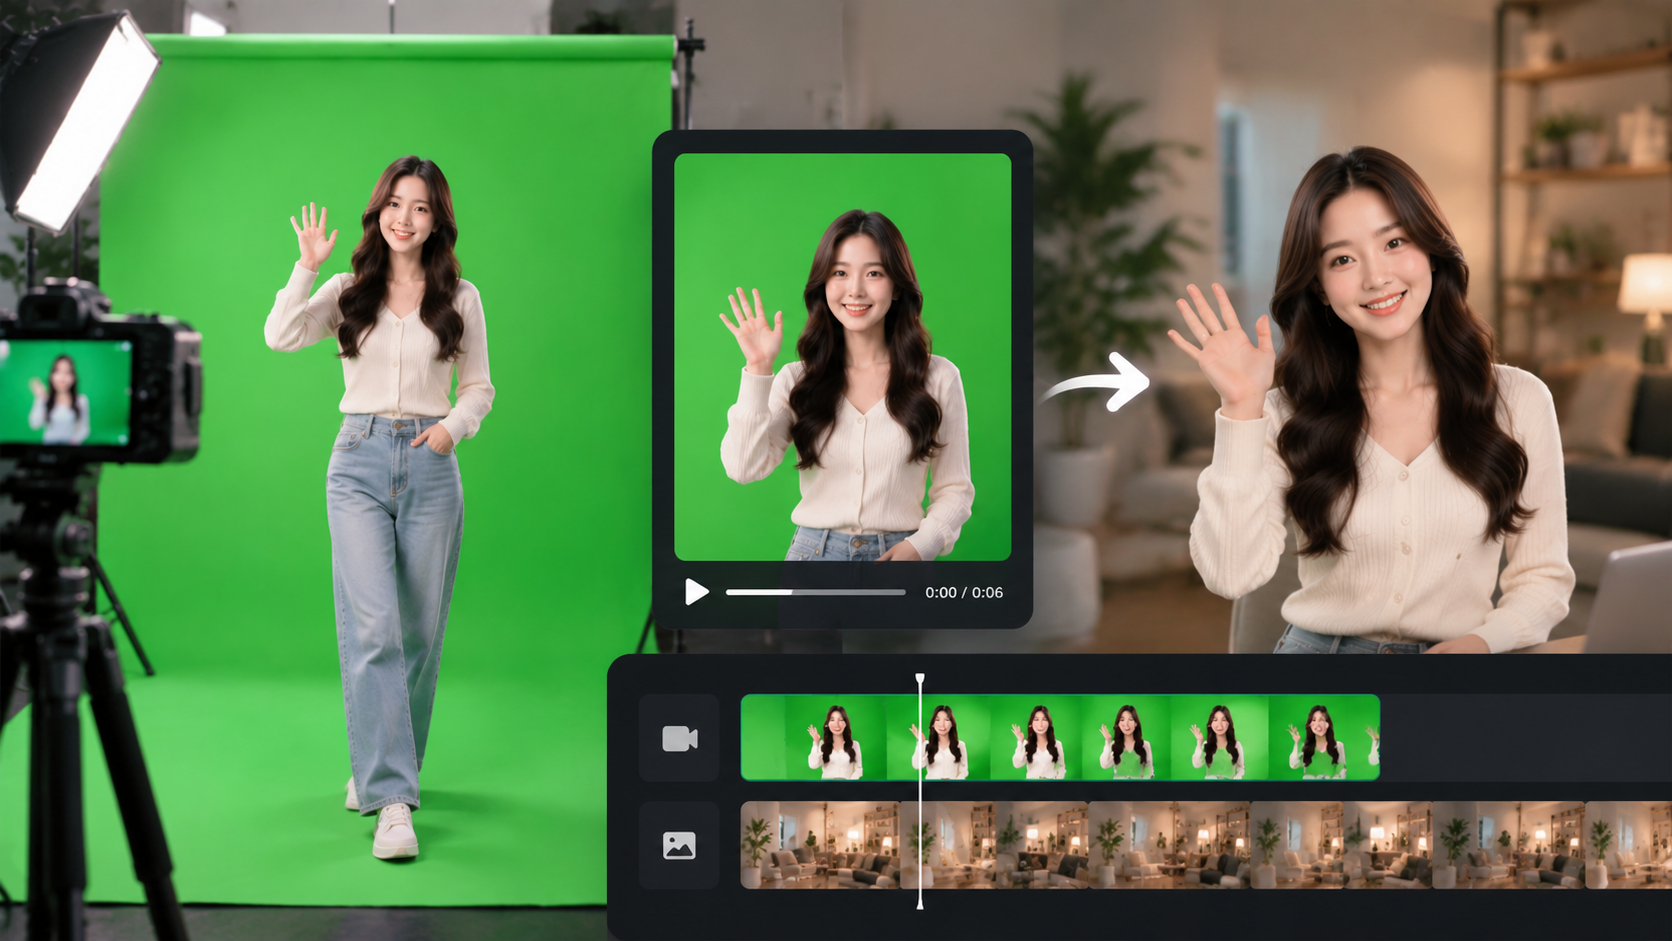
Ask for a "solid, evenly lit chroma key green background" or a "uniform chroma green background with flat lighting." Exclude gradients, textures, visible corners, props, and cast shadows.
These negative constraints matter because a chroma key tool removes a range of colors. Large changes in the background’s hue or brightness force you to widen that range, which can accidentally erase parts of the subject.
Specify the Shot Framing
State whether you need a wide shot, medium shot, or close-up. A wide shot suits full-body movement but leaves fewer pixels for fine facial and hair detail. A medium shot works well for presenters and hand gestures, while a close-up preserves facial detail but may crop the body.
Also tell the model to keep the subject fully inside the frame when the final composite requires an intact silhouette.
Focus on One Clear Action
Limit each short clip to one primary movement, such as waving, pointing, turning, or walking three steps. Several actions chained together can increase pose drift, distorted hands, and inconsistent timing.
If the final edit needs multiple actions, generate separate clips and join them on the timeline. In AI video generation, simple shots are easier to control than asking one generation to perform an entire routine.
Prompt Template:
Create a [shot type] video of [subject] performing [one clear action]. Use a solid, evenly lit chroma key green background with no gradients, textures, shadows, or other objects. Keep the subject fully visible within the frame and clearly separated from the background. Avoid green clothing and props. Use [camera angle] and keep the camera [static or moving smoothly].
Replace each bracketed field with a concrete direction. For example:
Create a medium-shot video of a presenter waving once with her right hand. Use a solid, evenly lit chroma key green background with no gradients, textures, shadows, or other objects. Keep the presenter fully visible within the frame and clearly separated from the background. Avoid green clothing and props. Use an eye-level camera angle and keep the camera static.
Treat the template as a starting point. When reviewing new versions, change only one variable at a time so you can identify which instruction improves or weakens the result.
How to Make a Green Screen Video with RoboNeo
RoboNeo is an AI creative platform that can generate short videos from text prompts. To create a green screen clip, describe your subject and action, then ask for a solid chroma green background with flat, even lighting. Follow the steps below to generate, review, and download your video.
The following workflow keeps that requirement visible from setup through final review.
Generate Green Screen Videos with AI
Step 1: Add a Video Node and Choose Text to Video
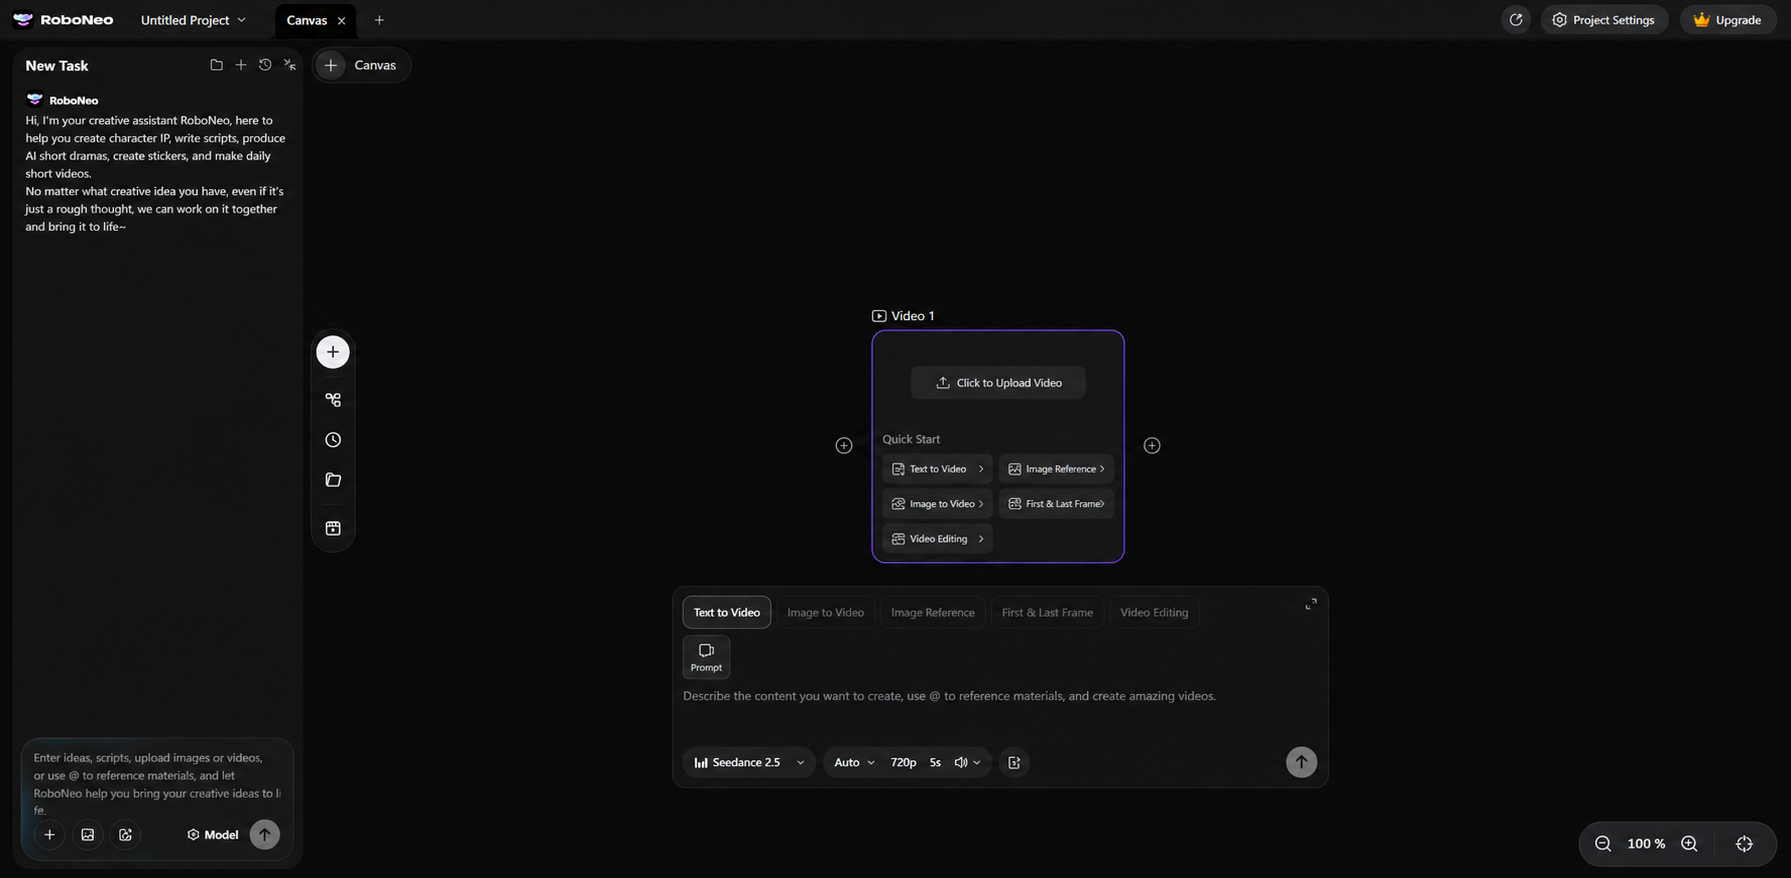
Open RoboNeo, create or open a project, and add a Video Node to the canvas. In that node, choose Text to Video as the generation mode.
This keeps the prompt, model, and supported output settings together, making it easier to revise an unsuccessful result without rebuilding the project.
Step 2: Enter Your Green Screen Prompt
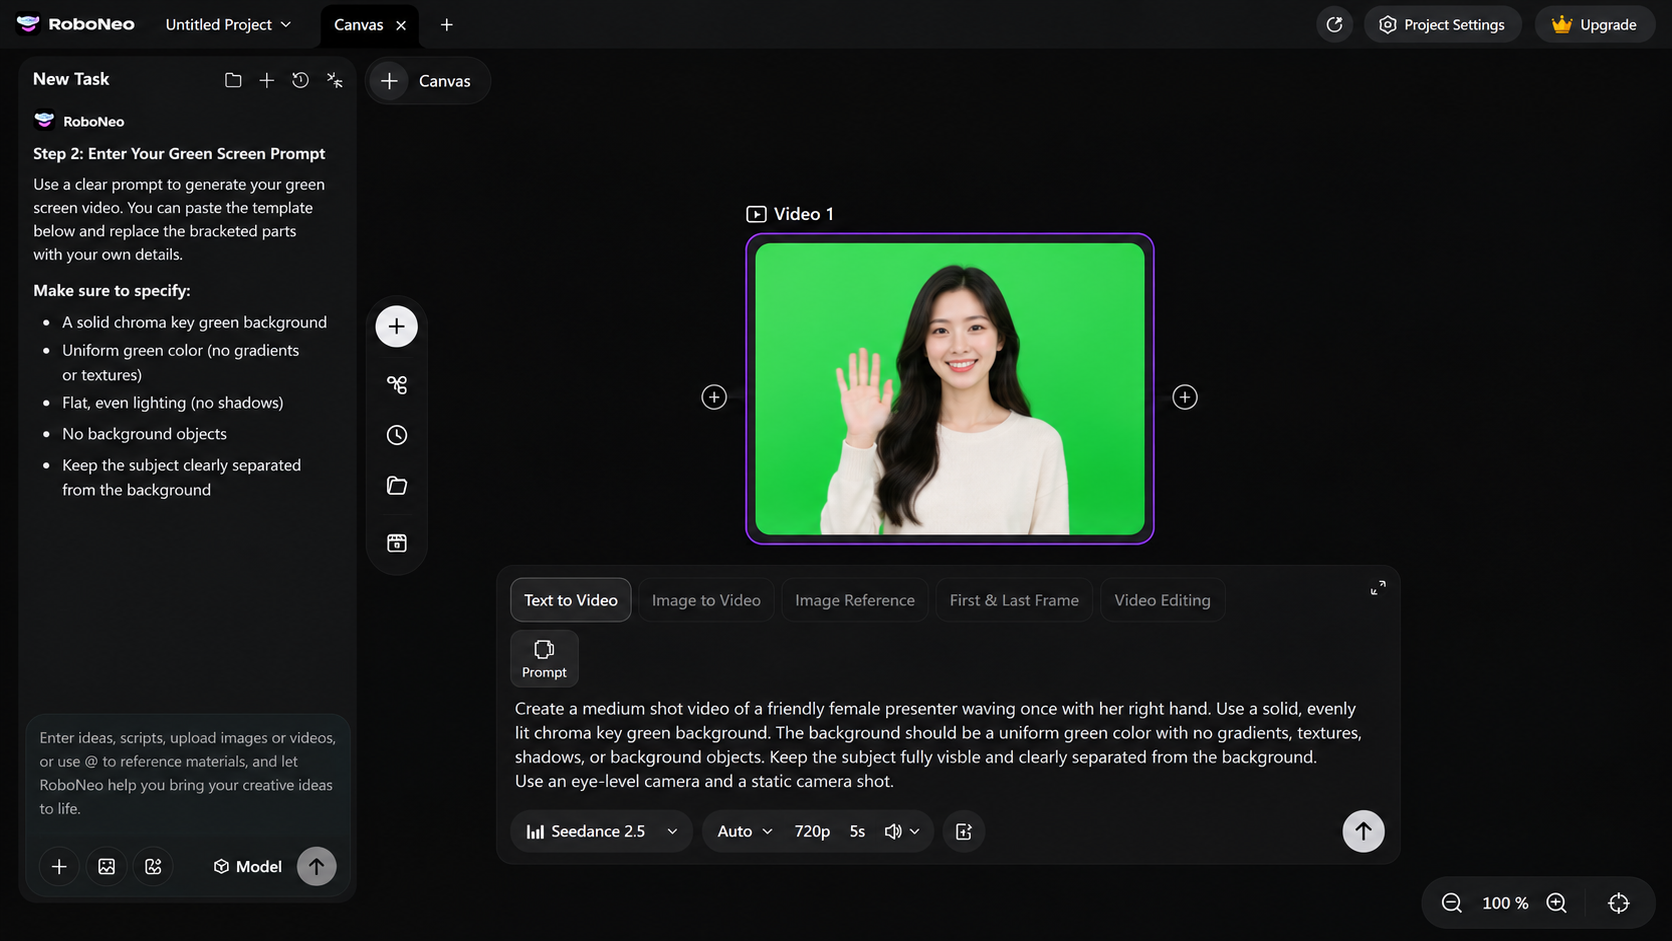
Paste the template from the previous section and replace the bracketed fields. Because RoboNeo does not present a dedicated Green Screen mode in its documented workflow, use precise English instructions such as:
Solid chroma key green background
Uniform green color
Flat, even lighting
No shadows
No background objects
Subject clearly separated from the background
Keep the subject description focused so these production constraints do not get buried under unnecessary creative details.
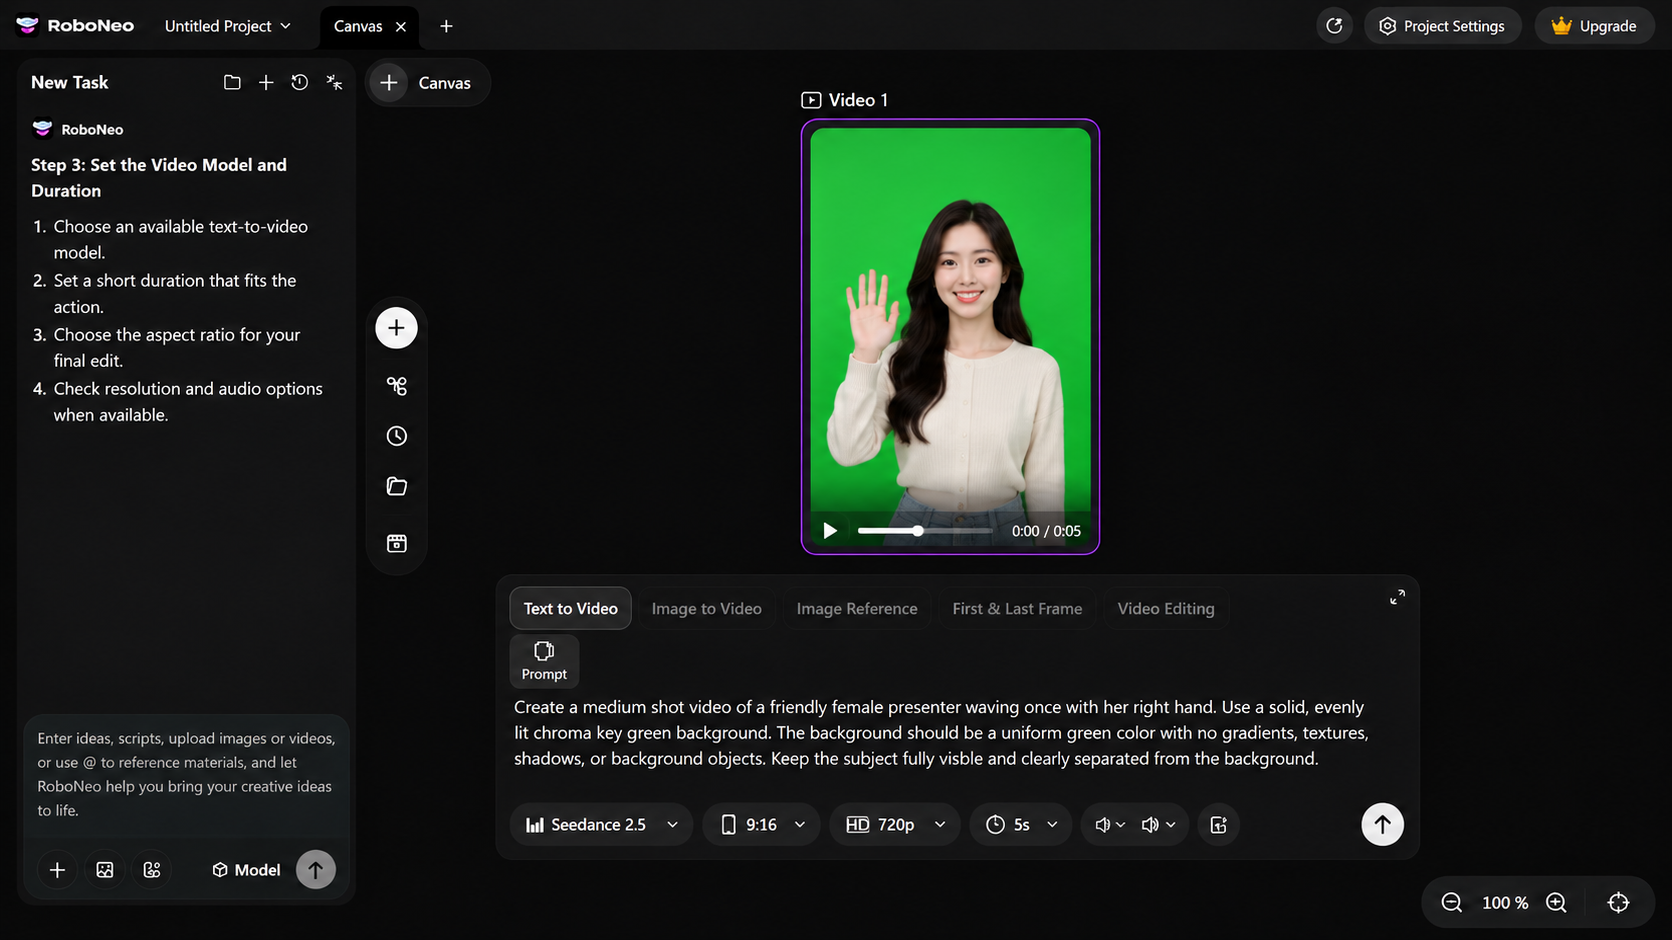
Step 3: Set the Video Model and Duration
Choose an available text-to-video model, then set the clip duration and any supported aspect ratio, resolution, audio, or output-count options. Available controls vary by model.
Prioritize a short duration that comfortably fits the single action. Select a format that matches the destination edit. For example, use a vertical aspect ratio for short-form social content or a landscape format for a presentation. If you only need a visual element for compositing, disable generated audio when the selected model provides that option.
Step 4: Generate, Review, and Download the Video
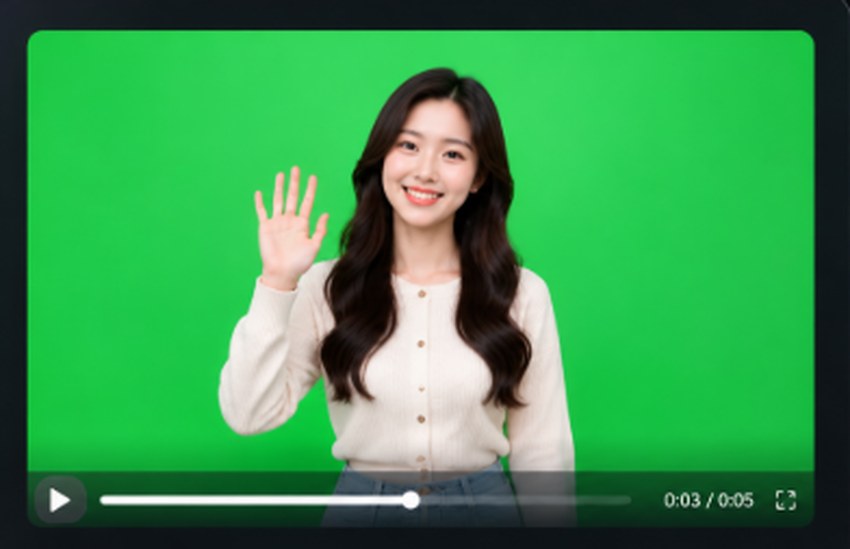
Generate the clip and inspect more than its opening frame. Scrub through the point of greatest movement and look for:
Background color shifts
Dark corners or unwanted shadows
Extra objects appearing behind the subject
Green reflections on skin or clothing
Unstable hands, hair, or clothing edges
Parts of the subject leaving the frame
If the clip fails one of these checks, revise one prompt element or setting and generate another version. Once the background and subject remain stable throughout the clip, and download the result.
Create Green Screen Videos Now
Tips for Generating Cleaner AI Green Screen Videos
Even a well-written prompt may need a few targeted adjustments. The following choices reduce the defects that are hardest for a chroma key tool to repair after generation.
Avoid Fast Motion and Motion Blur
Fast hand movements, spins, and sudden camera moves can expose common AI video generation limitations, creating semi-transparent edge pixels that contain both the subject and the green background. Ask for slow, deliberate motion and a static camera whenever possible.
If speed is essential, break the action into shorter clips so each generation has a simpler motion path to preserve.
Avoid Green Clothing and Props
A chroma key removes the selected green wherever it appears, including on the subject. Avoid green shirts, jewelry, product packaging, logos, and translucent props that reflect the background.
If green is essential to the subject, request a uniform blue chroma background instead and confirm that blue is not prominent in the subject.
Keep Lighting Consistent
"Flat, even lighting" should apply throughout the clip, not only in the first frame. Ask for stable exposure, no flickering, no dramatic rim light, and no cast shadow on the background.
During review, compare the corners with the area immediately around the subject. If the green changes over time or becomes noticeably darker near the subject’s feet, generate a new version before moving to post-production.
Choose Subject Colors That Contrast with Green
Red, magenta, orange, blue, white, and neutral wardrobe usually separate more clearly from chroma green than yellow-green or teal details. Strong color separation gives the keyer more room to remove the background without eating into clothing or hair.
Watch reflective and transparent surfaces closely, since they can still pick up green even when their base color contrasts well with the background.
FAQ
Can you make a green screen video without filming?
Yes. A text-to-video generator can create both the subject and the green background, so no camera shoot is required.
The output is still generative, which means details may vary between attempts. Review every frame before treating the clip as ready for compositing.
How do you remove the green background from an AI-generated video?
Place the replacement background on the lower timeline track and the green-screen clip above it in an editor with chroma key controls. Sample the green, increase the key strength only until the background disappears, and then refine edge feathering and spill suppression.
Check hair, fingers, and moving edges across the full clip instead of judging the result from a single frame.
Can you use an AI-generated green screen video in CapCut?
Yes. Import the replacement background and AI-generated clip, place the green-screen clip on the upper track, and select it. In the current CapCut desktop workflow, Chroma Key is located under Video → Remove BG → Chroma Key, although interface labels may vary by platform and app version.
Use the color picker to sample the green. Adjust Strength, Shadow, and any available edge controls until the background disappears without making the subject transparent.
Why does a green screen video have rough edges after removing the background?
Common causes include motion blur, an uneven green field, heavy compression, fine hair, transparent materials, and green spill reflected onto the subject.
Lowering an overly aggressive key, sampling a cleaner green area, adding a small amount of feathering, and using spill suppression can help. If the source edge is already smeared or distorted, generating a slower and cleaner clip is often more effective than pushing the keyer harder.
What is the best background color for a green screen video?
Bright, uniform chroma green is the usual choice because it is easy to isolate and typically differs from human skin tones. Blue is a better alternative when the subject contains green clothing, products, foliage, or green branding.
Whichever color you choose, uniformity, separation from the subject, and stable lighting matter more than using a particular hex value.
You May Be Interested
How to Make a Dark Video Brighter with AI: 5 Easy Steps
How to Make a Meme Video: Types, Steps, and Simple Tips
How to Make a Logo Transparent: Steps and Fixes
How to Make a Memorial Video: AI Tips for Meaningful Memories
How to Make a Product Video: Scripts, Shots, and Sharing