How to Make a Reaction Video: Different Ways to Create One
 RoboNeo TeamOctober 30, 2026
Want to record a reaction video but do not know how to show the original content and your response at the same time? Depending on your equipment and editing experience, you can record both views together, capture your reaction separately, or use a built-in social media feature.
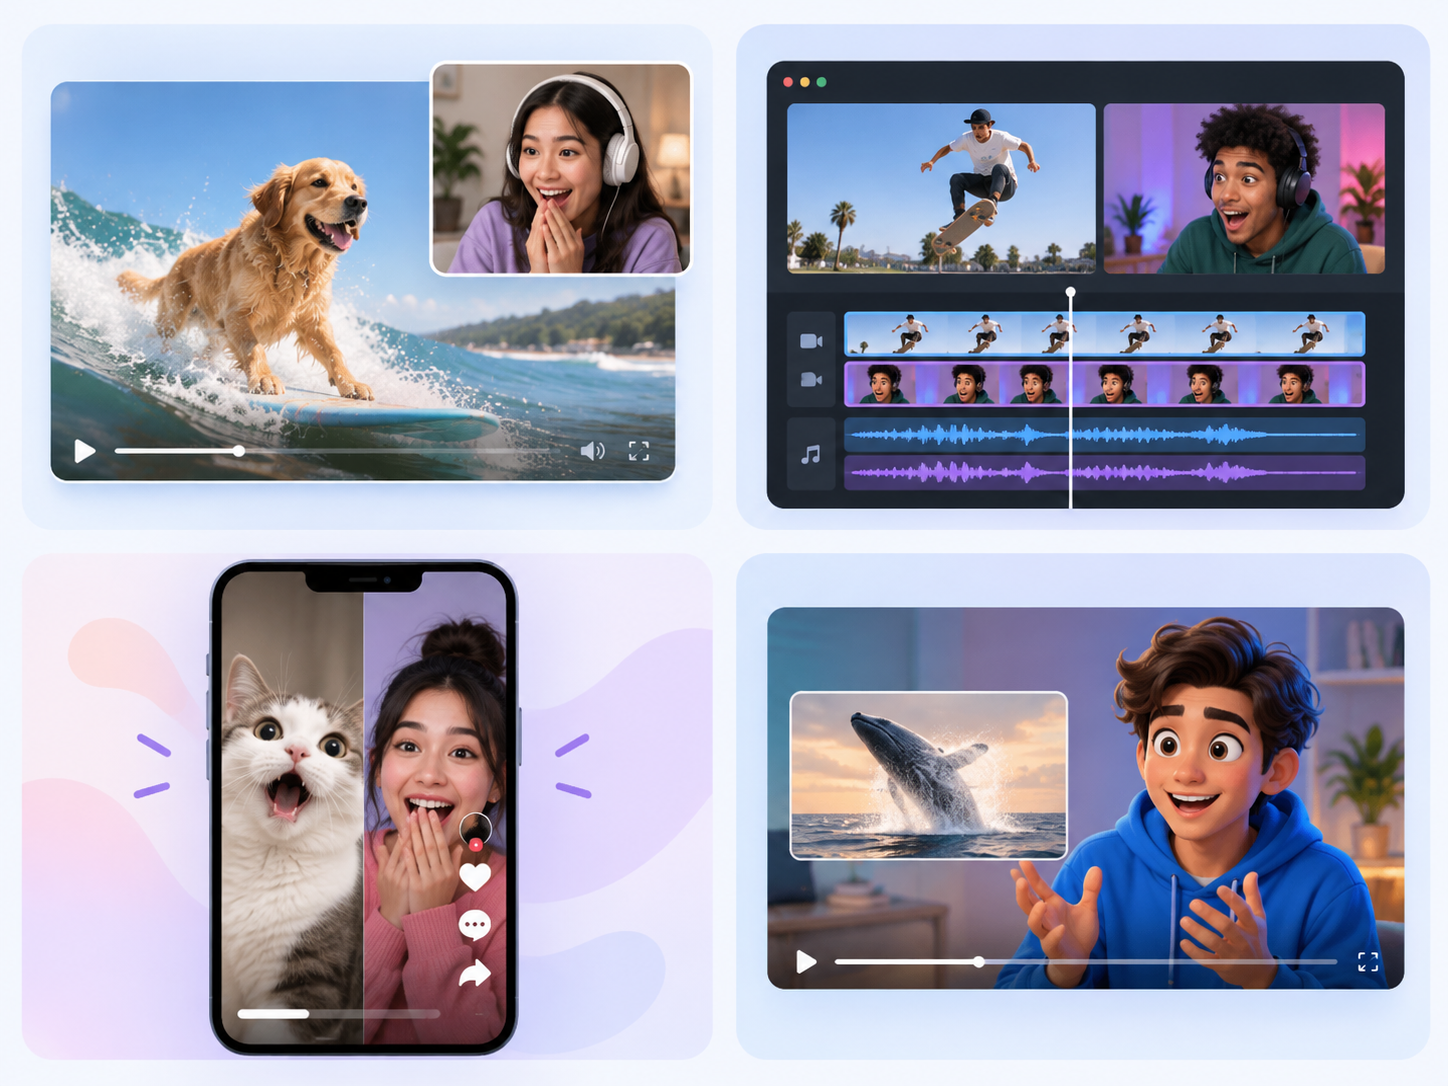
This guide explains how to make a reaction video in four ways: picture-in-picture recording, separate recording, TikTok Duet or YouTube Shorts Collab, and an AI character workflow. Comparing these methods will help you choose the right setup for a live human response, a polished edit, a quick social post, or a faceless reaction channel.
How to Make a Reaction Video in Four Ways
Each reaction video method offers a different balance of speed, editing control, and recording requirements. Consider where you plan to publish the video and whether you want to appear on camera before choosing a workflow.
Method 1: How to Make a Reaction Video with Picture-in-Picture
Picture-in-picture recording is suitable for users who want to watch the original video, record their response, and display both views at the same time. Because the layout is created during recording, this method requires less editing than recording the two videos separately.
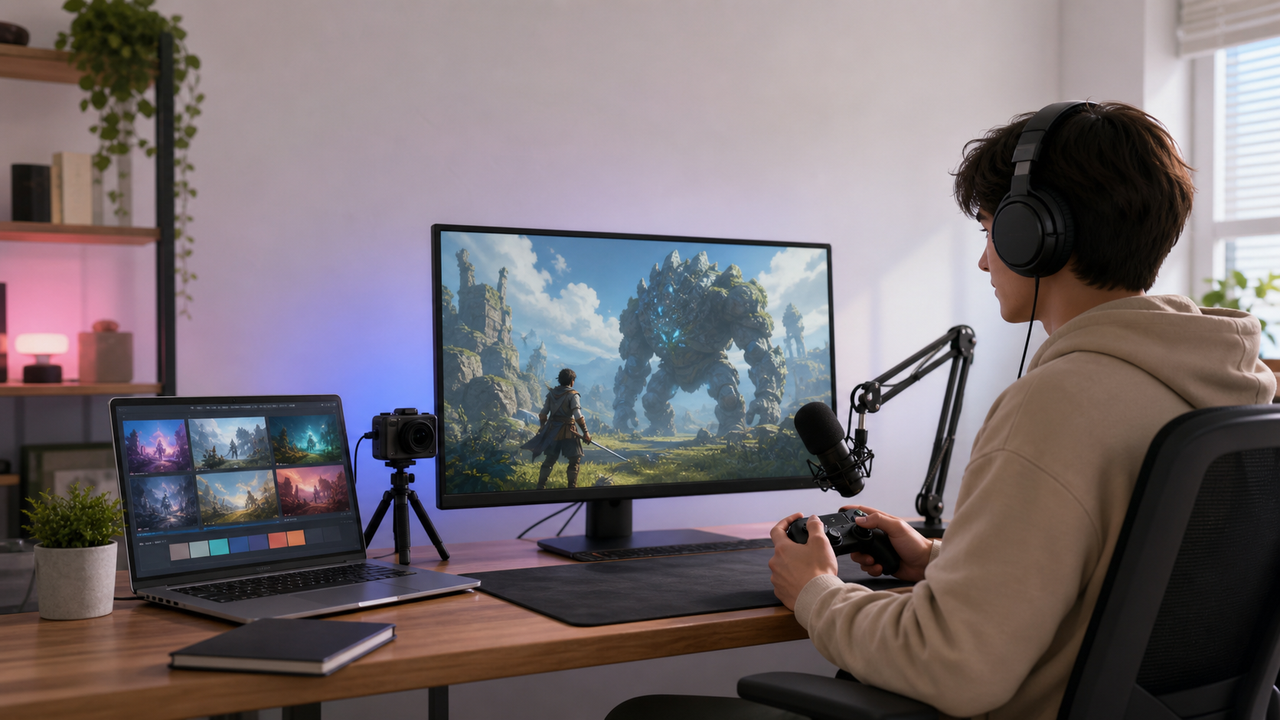
Step 1: Choose the Video and Open Your Recording Tool
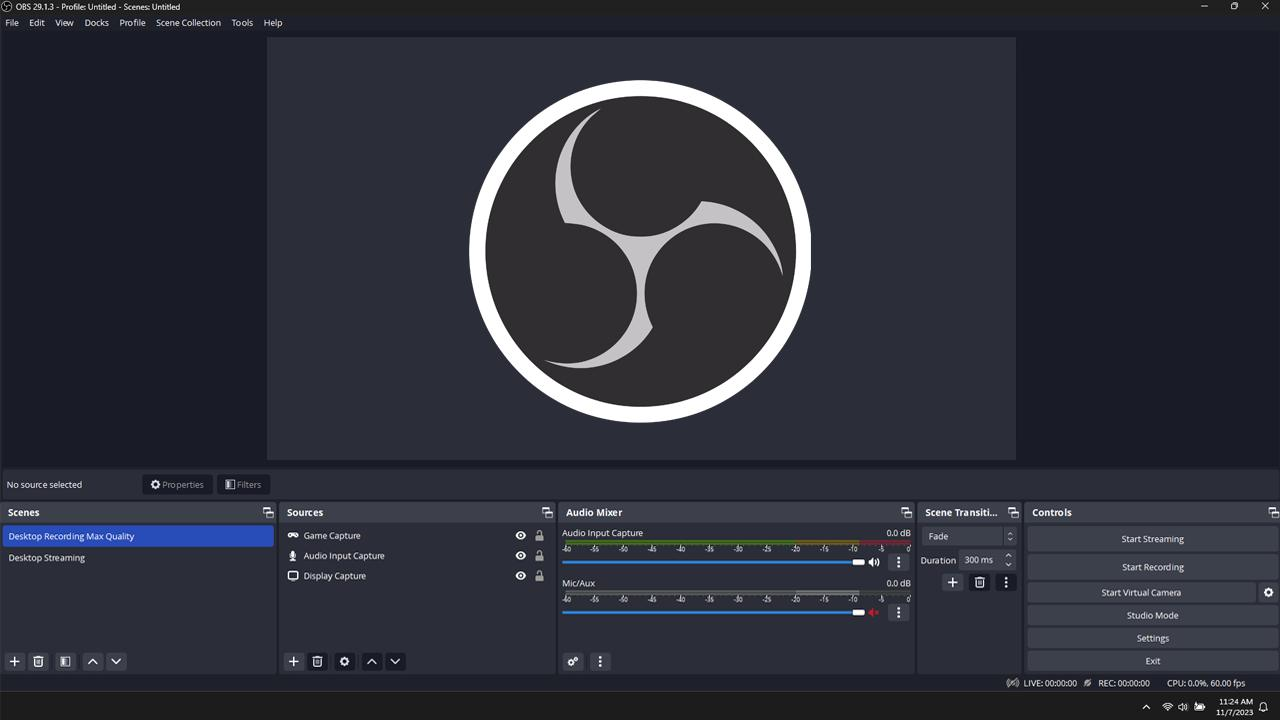
Choose a video that you created, licensed, or otherwise have the right to use. Open a recording tool that can capture the source video, system audio, webcam, and microphone.
Before recording the full reaction, make a short test clip. Confirm that the source video and camera feed are visible and that both audio sources are being captured.
Step 2: Set the Picture-in-Picture Layout
Keep the source video large enough for viewers to understand what is happening. Resize your camera window and move it to a corner that does not cover faces, subtitles, or other important details.
For a horizontal YouTube video, a small corner window often works well. For a vertical TikTok or YouTube Short, a top-and-bottom layout may use the available space more effectively.
Step 3: Wear Headphones to Prevent Echo
Wear headphones while listening to the original video. This prevents the video’s sound from playing through your speakers and entering the microphone, which can create echo or overlapping audio.
Check the microphone level before recording. Your voice should remain clear and easy to hear without completely overpowering the original video. If necessary, light audio processing can also help remove background noise from a video after recording.
Step 4: Review and Save the Video
Review the beginning, middle, and end of the recording. Make sure the reaction window does not cover important content and check that the original audio has not been recorded twice.
If the picture and sound are clear, save a high-quality master file. You can then create separate horizontal or vertical versions for different platforms.
Method 2: How to Make a Reaction Video by Recording Separately
This method is suitable for users who want to record their expressions, comments, and spoken reactions as a separate file before combining them with the original video. It provides more control over the reaction window, audio levels, timing, and final layout.
Step 1: Wear Headphones While Recording Your Reaction
Play the original video through headphones while recording yourself with a camera and microphone. This allows you to hear the content without letting the original audio enter the microphone at full volume.
At the beginning of the recording, clap once or say a short synchronization phrase. The resulting audio spike can help you align the recordings in an editor.
Step 2: Import Both Videos into an Editor
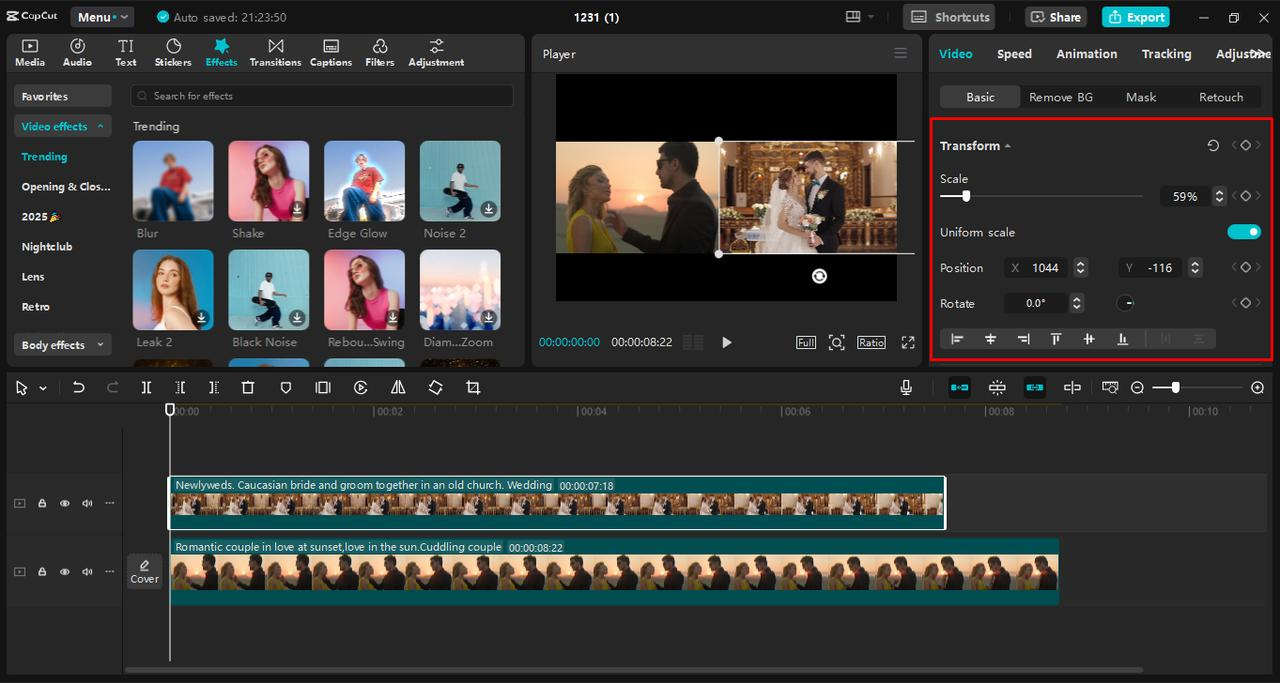
Import the original video and your reaction recording into a video editor. Place the original content on the main video track and the reaction footage on a track above it.
Do not trim either recording until they are synchronized. Keeping the original files intact makes it easier to find the correct starting point.
Step 3: Sync the Audio Waveforms
Expand the audio waveforms for both recordings. Find a distinctive line of dialogue, sound effect, or synchronization clap and align the matching waveform peaks.
Play several sections across the timeline to check the synchronization. Look at your lip movements, the timing of your expressions, and the moments when you respond to the source. If the timing begins to drift, split and realign the affected section.
Step 4: Check the Audio and Export the Video
Lower the source audio when you speak so that your commentary remains easy to understand. If the camera recording contains a quiet copy of the source audio, mute or remove that track after synchronization to avoid doubled sound.
If unwanted wind, hum, or room noise remains, an AI audio denoiser can clean the embedded audio before the final mix. Check the finished video with headphones, add captions if needed, and export it in the resolution and aspect ratio required by your chosen platform.
Check the finished video with headphones, add captions if needed, and export it in the resolution and aspect ratio required by your chosen platform.
Method 3: How to Make a Reaction Video for Free with TikTok and YouTube
TikTok Duet and YouTube Shorts Collab are suitable for users who want to create and publish a reaction directly through a social platform. Both tools place your recording beside eligible source content, although their menus and layout options are not identical.
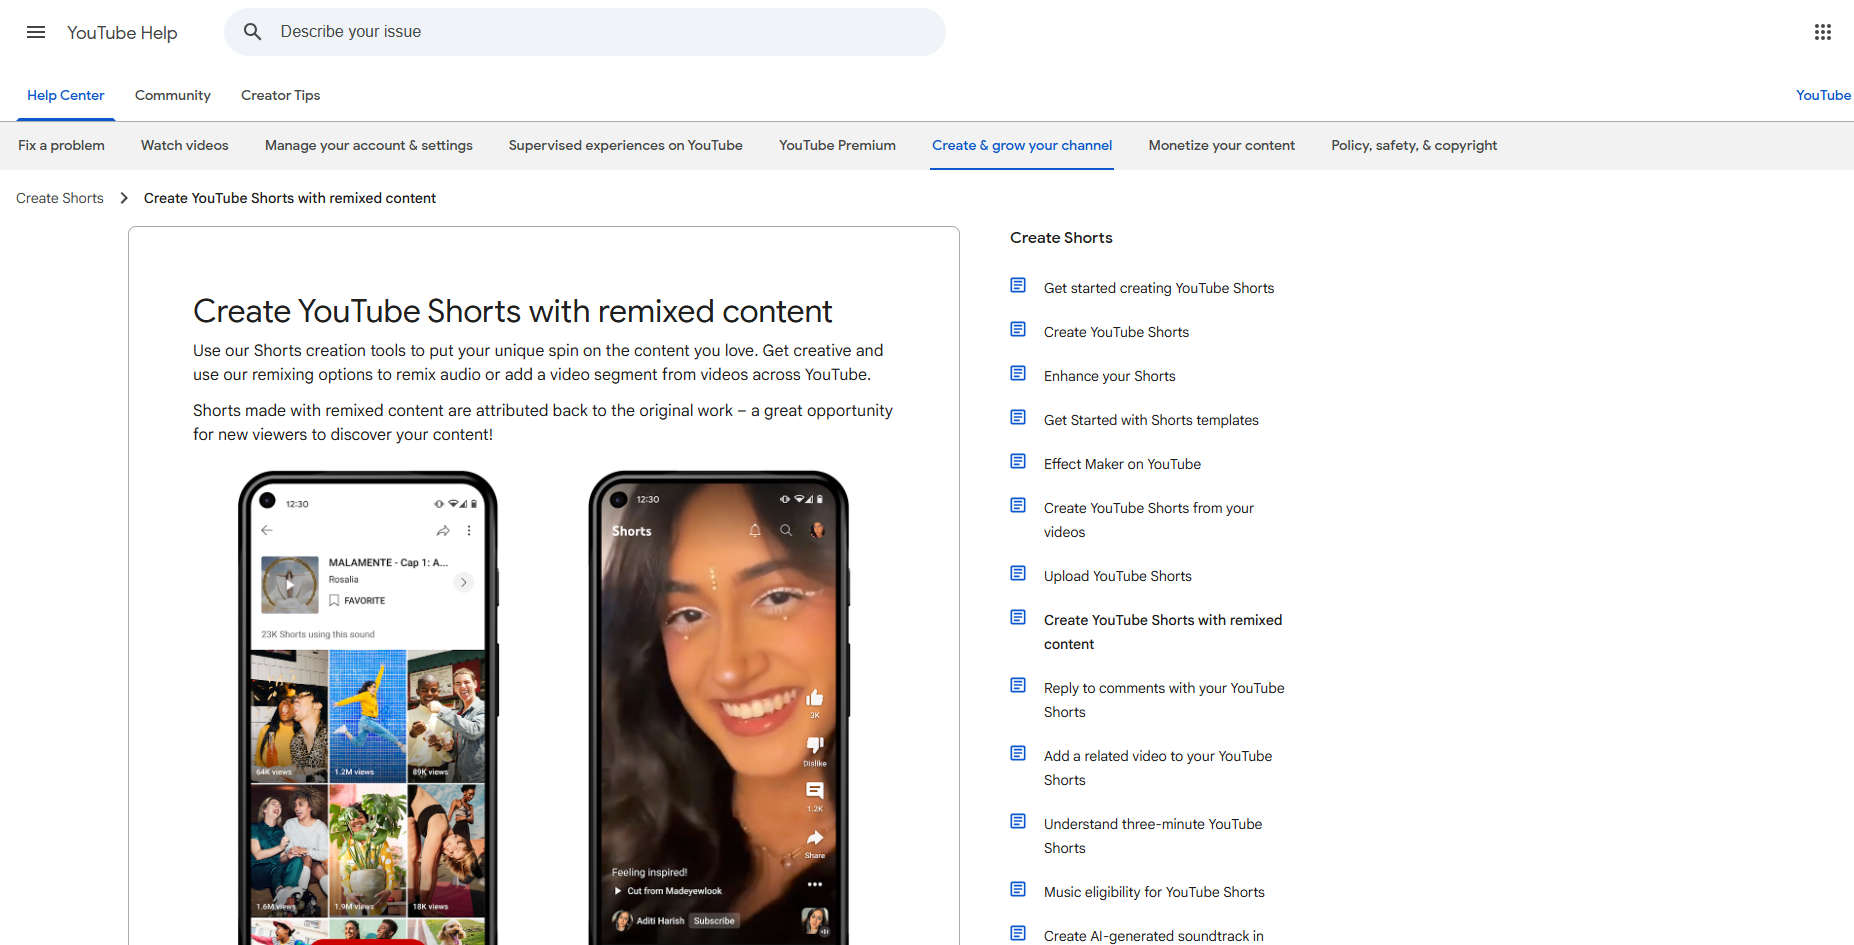
Step 1: Open the Original Video and Select Duet or Collab
On TikTok, open the video you want to react to, tap Share, and select Duet. If Duet is unavailable, the original creator may have disabled the feature.
On YouTube mobile, open an eligible Short and tap Remix > Collab. For an eligible long-form video, tap Share > Remix > Collab. YouTube creators and rights holders can limit whether their videos are available for remixing.
Step 2: Choose a Layout and Check Your Camera and Microphone
Choose an available side-by-side, top-and-bottom, or picture-in-picture layout. Select a format that keeps the original subject and your reaction easy to see.
Preview your camera framing and check microphone access before recording. The layouts available in TikTok and YouTube may differ depending on the app version, device, and source video.
Step 3: Record Your Reaction
Start recording and react as the original content plays. Instead of relying only on facial expressions, add comments that explain why a moment is surprising, funny, misleading, impressive, or important.
Meaningful commentary gives viewers a reason to watch your version. It can also make the difference between a genuine reaction video and a minimally changed copy of the original content.
Step 4: Review and Publish the Video
Review the sound, camera framing, captions, and source attribution. Make sure your commentary is louder than the original audio and is not hidden by background music.
Add an accurate caption or title and choose a clear cover image. If the reaction was edited outside the app, check the recommended settings for uploading high-quality videos to TikTok before publishing it through the platform’s review screen.
| Parameter | TikTok Duet | YouTube Shorts Collab |
| Best for | Quick reactions to TikTok posts | Reactions to eligible Shorts and YouTube videos |
| Recording setup | Camera and microphone inside TikTok | Camera and microphone inside YouTube |
| Editing needed | Minimal; editing stays within TikTok | Minimal; editing stays within YouTube Shorts |
| Main limitation | The original creator must allow Duet | The source video must be eligible for remixing |
Method 4: How to Make an AI Reaction Video Step by Step
An AI workflow is useful for faceless channels, VTubers, and animated characters that react to a topic without showing the creator’s real face. Users can give RoboNeo instructions describing the reaction scene, character expressions, and movements, then upload a character image or reference material.
RoboNeo provides AI video generation and editing capabilities, but not every model or generation mode should be assumed to create a complete picture-in-picture reaction video automatically. If the original source must appear beside the character, the generated reaction clip may still need to be combined with that source in an editor.
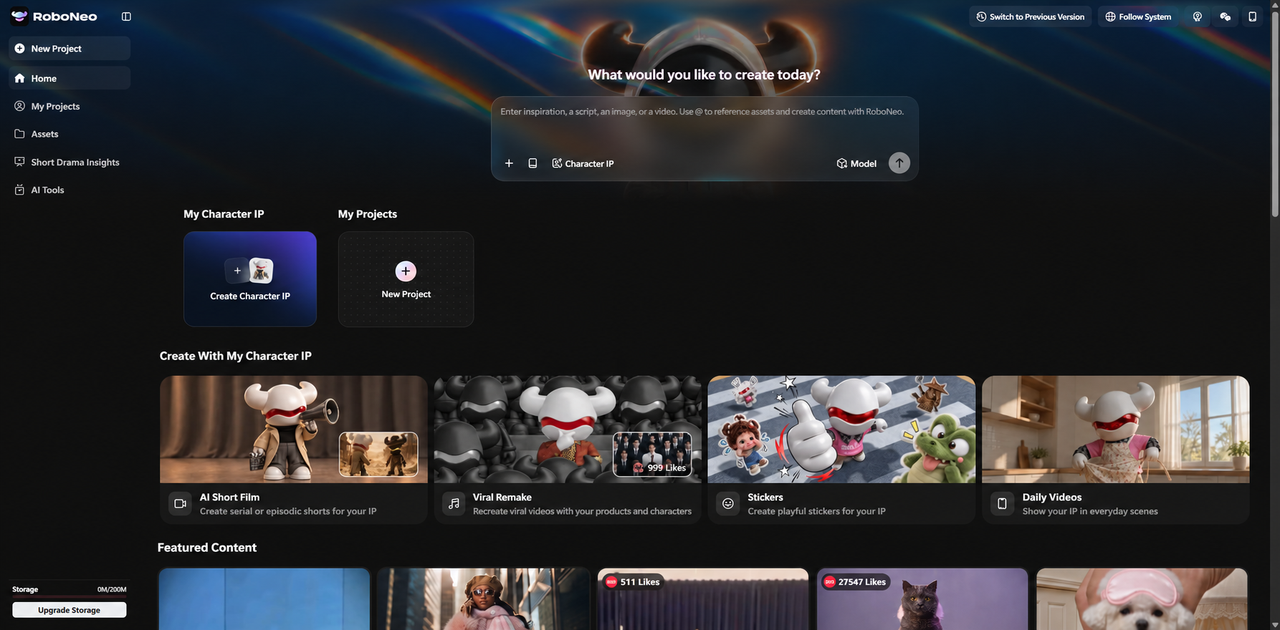
Step 1: Choose a Video Model
Open RoboNeo and choose a video model that fits the intended visual style, such as an animated, stylized, or realistic character performance.
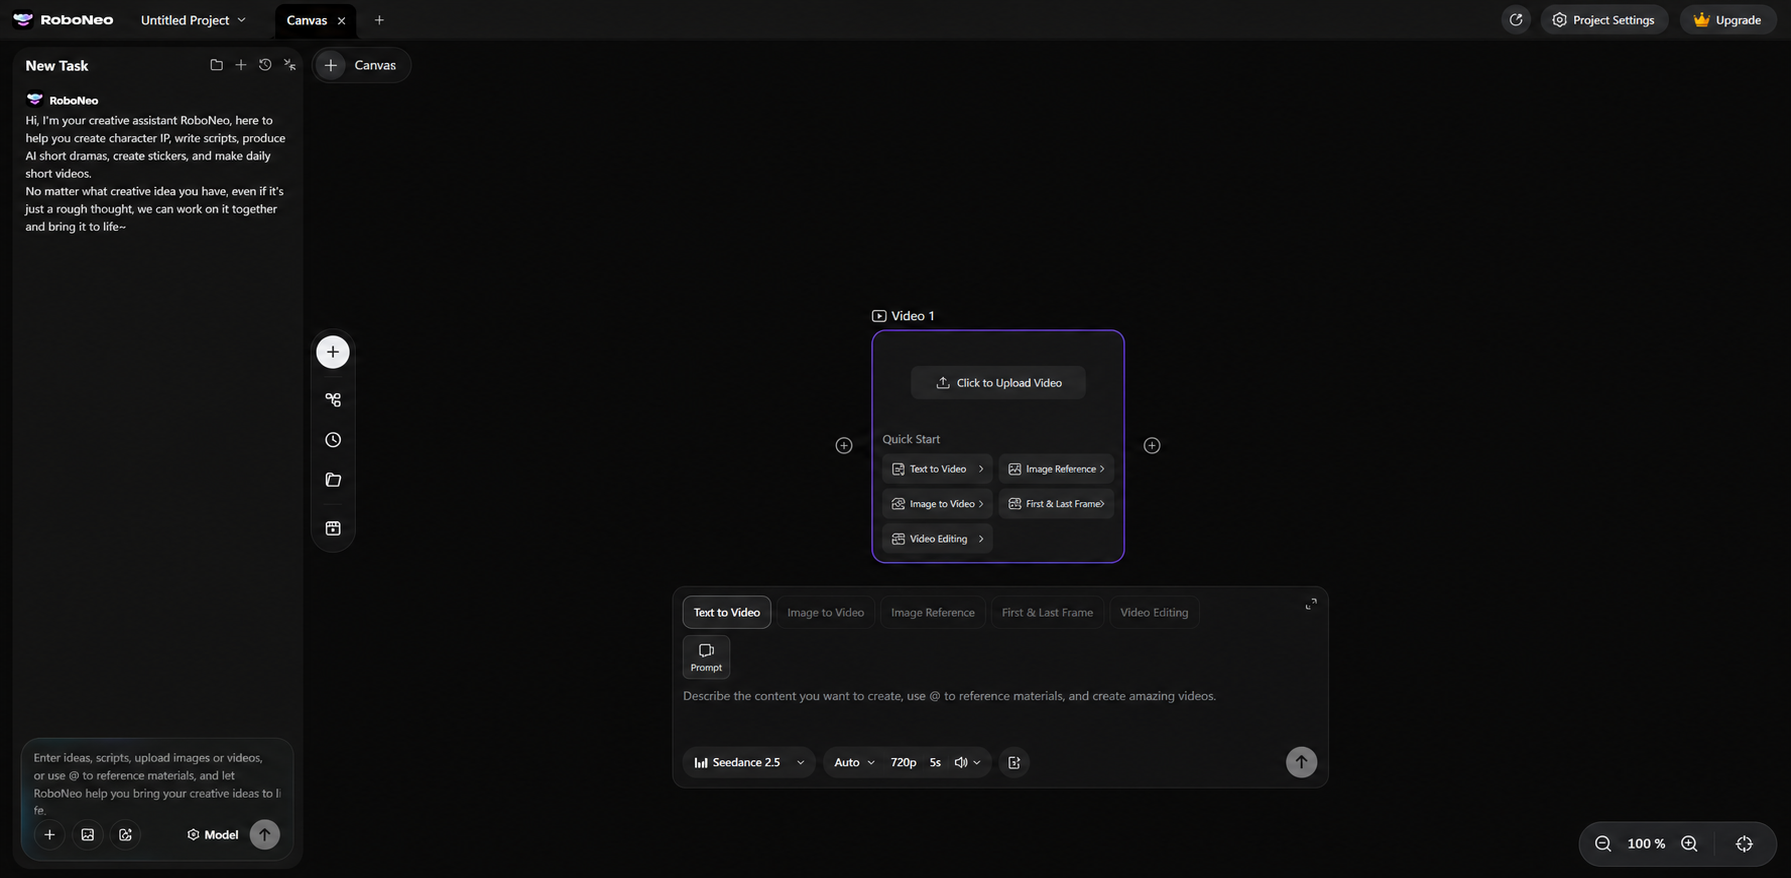
Step 2: Upload Your Character Image and Describe the Reaction
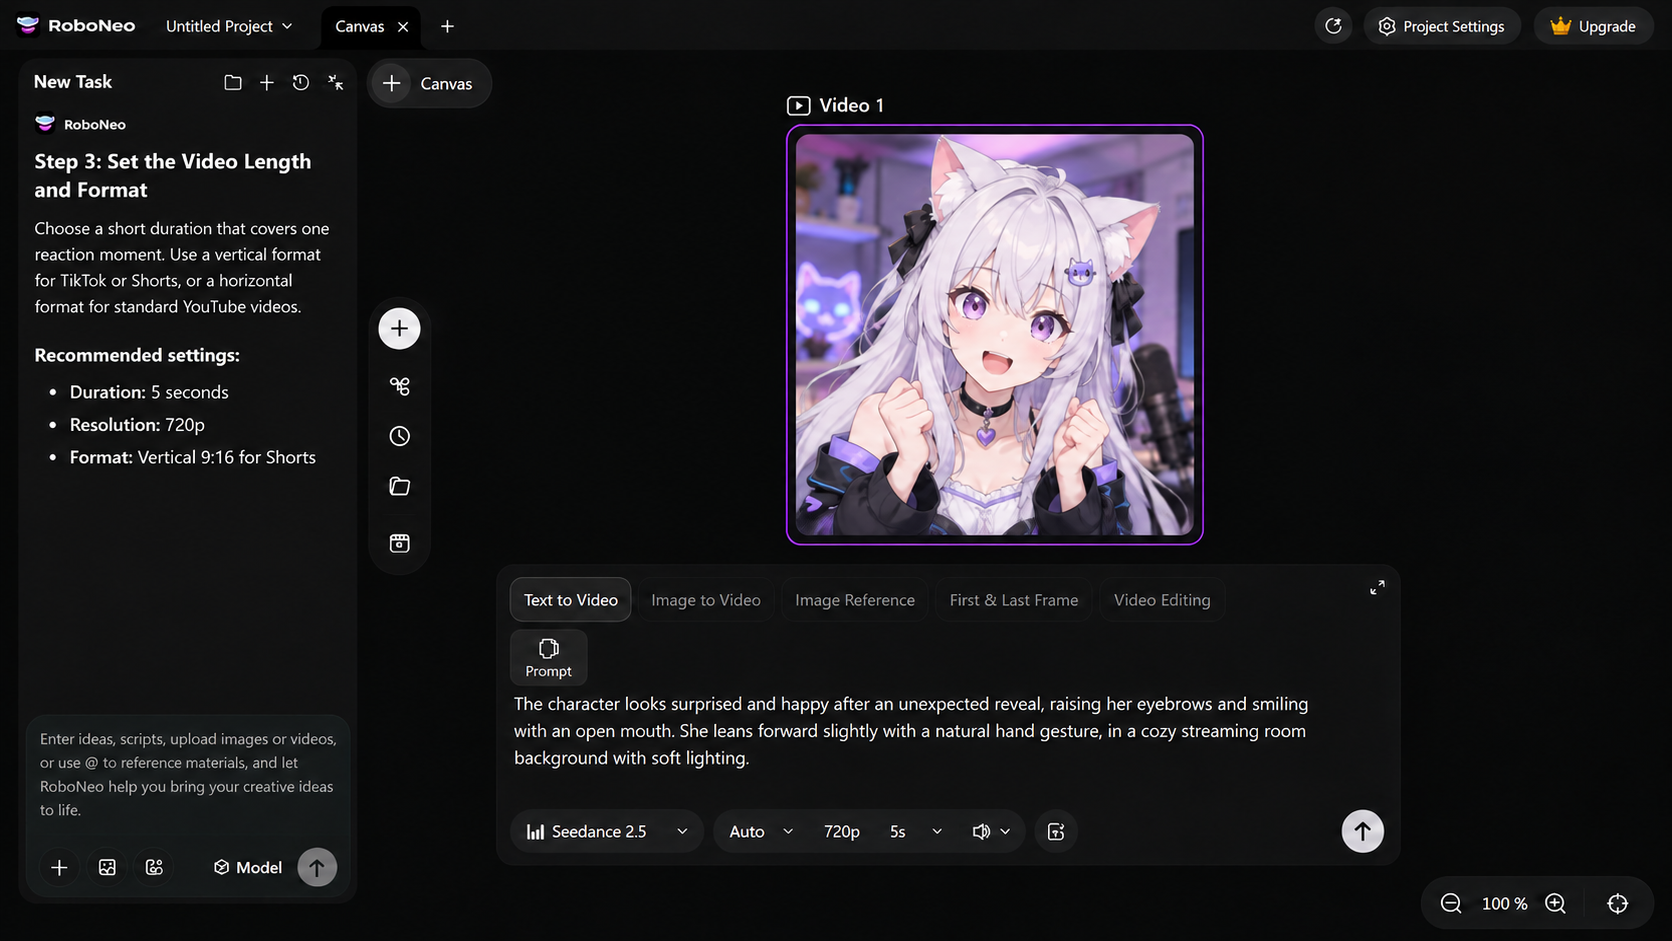
Upload a character image or reference video. Describe the emotion, expression, gesture, and reaction scene, such as a character leaning forward, raising their eyebrows, and laughing after an unexpected reveal.
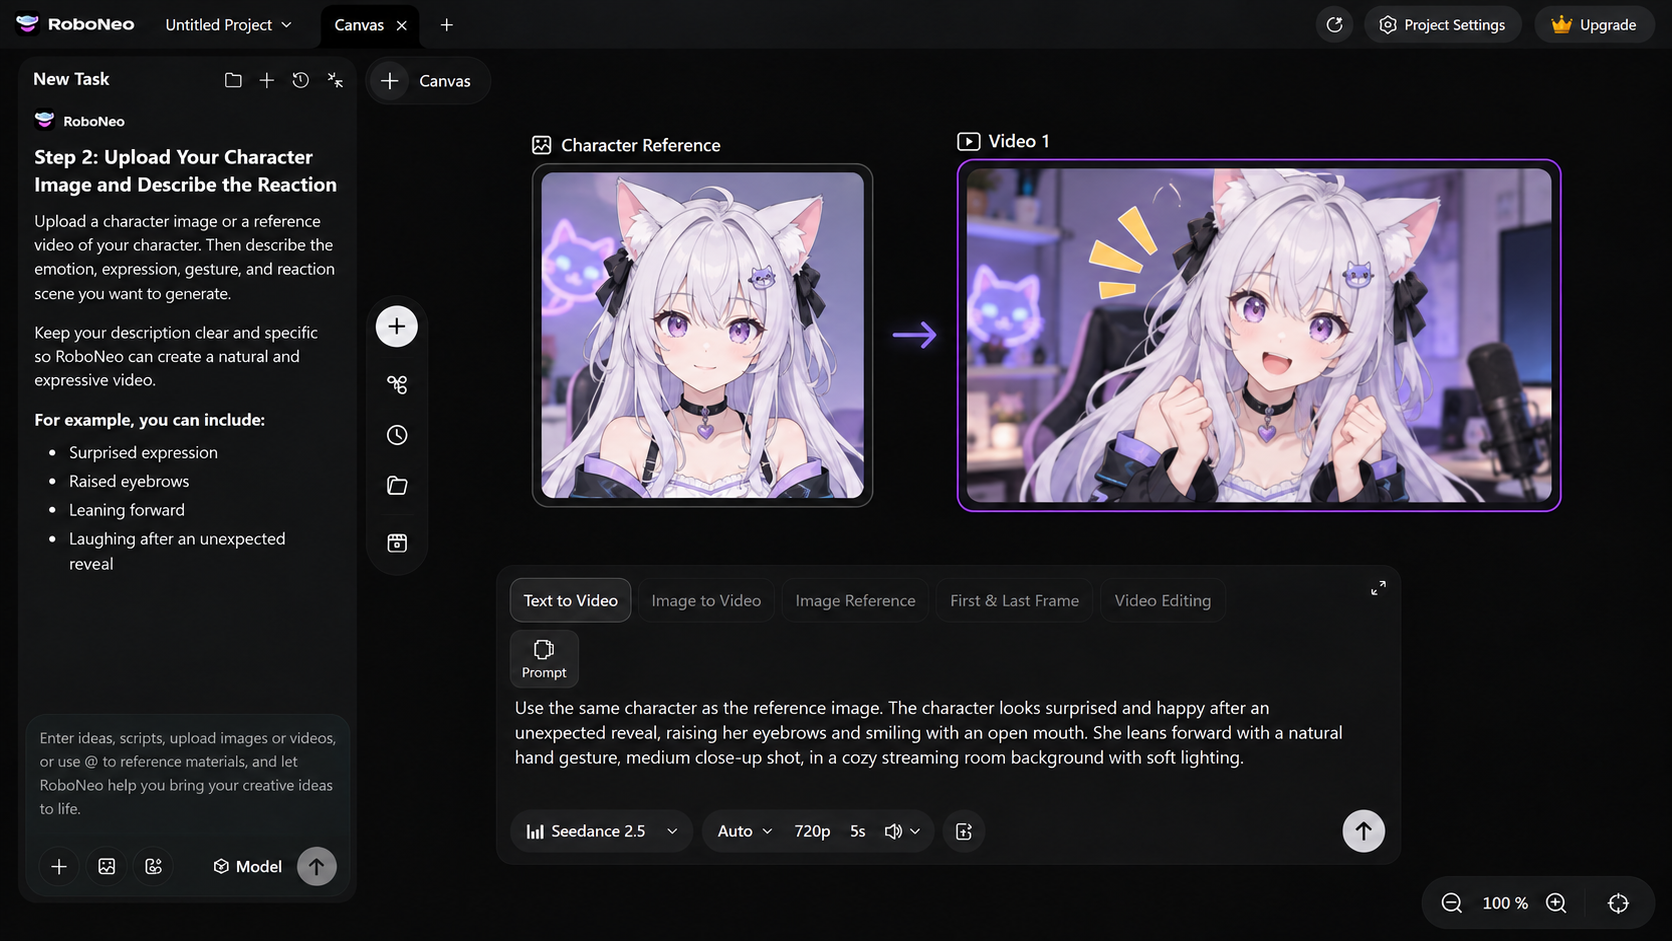
Step 3: Set the Video Length and Format
Choose a short duration that covers one reaction moment. Use a vertical format for TikTok or Shorts and a horizontal format for a standard YouTube video.
Step 4: Generate and Download the Reaction Clip
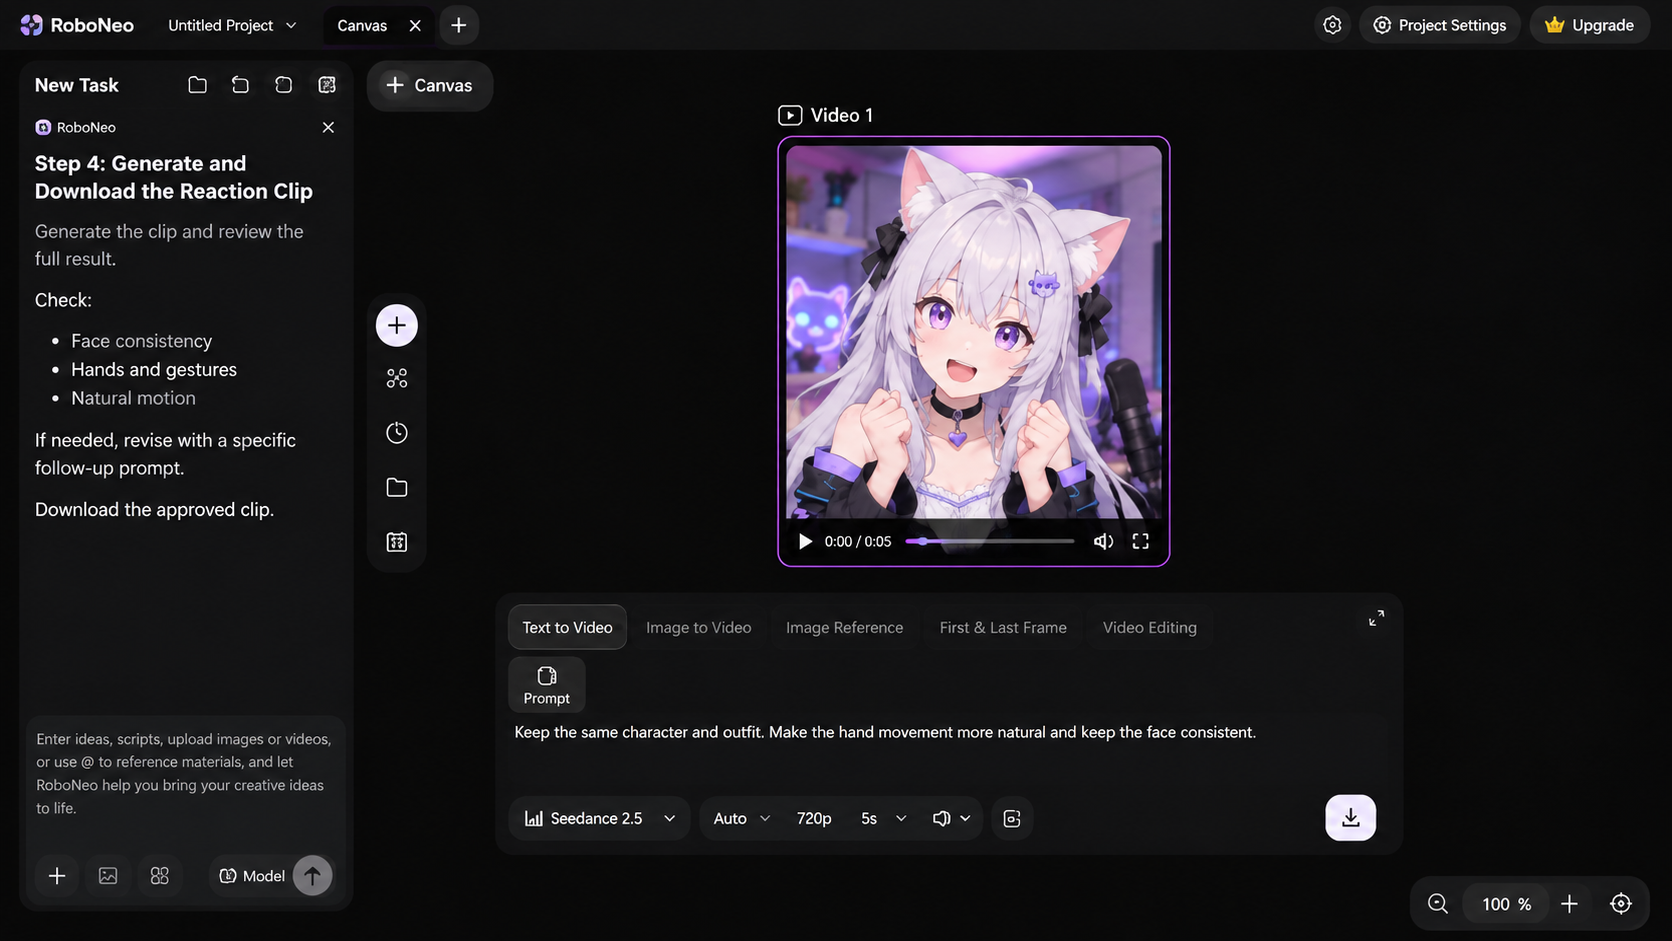
Generate the clip and check the character’s face, hands, motion, and consistency. Use follow-up instructions to request changes, then download the approved result from the RoboNeo creation workspace.
Choosing the Right Reaction Video Method for Your Need
| Method | Best for | Requires appearing on camera | Requires recording equipment | Editing flexibility | Main advantage | Main limitation |
| Picture-in-picture recording | Fast, live human reactions | Yes | Yes | Low to medium | Records the source and reaction together | Layout mistakes are harder to correct |
| Separate reaction recording | Polished YouTube commentary | Yes | Yes | High | Independent control of timing, audio, and framing | Requires more editing and synchronization |
| TikTok Duet or YouTube Collab | Quick platform-native reactions | Yes | Usually only a phone | Low | Built-in alignment and source attribution | Only works with eligible source videos |
| RoboNeo AI character | Faceless channels, VTubers, and animated reactions | No | No camera setup required | Medium to high | Supports reusable characters and multi-shot animated workflows | Source footage may still require separate compositing |
If you want to create a faceless reaction channel, RoboNeo provides an alternative to repeatedly filming yourself. You can describe a character’s expressions, actions, and reaction scene, upload reference material, and refine the result through follow-up instructions.
For a multi-shot animated reaction, character assets can be managed and reused across scenes to support greater visual consistency and continuity. RoboNeo can bring concepts, storyboards, references, and shot-by-shot generation into one workflow, reducing the need to move between traditional modeling, rigging, and editing programs.
RoboNeo’s AI Agent can also help coordinate different parts of video production, including scene creation, voice, subtitles, and transitions. This makes it particularly relevant to VTuber and animated reaction formats, while traditional PiP or separate recording remains the more appropriate choice for authentic live human reactions.
Navigating Copyright and Fair Use for Reaction Videos
Making a reaction video does not automatically give you permission to use another person’s content. In the United States, fair use is evaluated case by case, and there is no fixed number of seconds or percentage that is always safe to use.
Pause the Original Video to Add Commentary
Pause the source whenever you need to explain an idea, challenge a statement, or point out an important detail. Letting the original video play continuously while offering only occasional expressions can make your contribution seem limited.
Pausing alone does not guarantee fair use. Its value comes from giving your commentary enough time and space to become a meaningful part of the video.
Add Meaningful Commentary and Analysis
Explain why you agree or disagree with the source, identify a technique, provide expert context, or connect the clip to a broader issue. Your comments should add information, interpretation, humor, or a new perspective rather than simply describing what viewers can already see.
The U.S. Copyright Office identifies commentary and criticism as purposes that may qualify for fair use, but courts consider the purpose, nature, amount used, and market effect in each case. There is no automatic fair-use formula based on clip length.
Adjust Visuals and Audio Without Relying on Editing Alone
Cropping the original footage, lowering its volume, changing its pitch, or mirroring the picture may change how the video looks or sounds. However, those technical edits do not automatically make the use transformative or legally permitted.
Build the reaction around your own commentary and use only the source material needed to support each point. If the original video provides most of the entertainment value, consider obtaining permission or using licensed material.
What Should You Check Before Publishing a Reaction Video?
Before publishing, review the video from the viewer’s perspective and confirm that you have an appropriate basis for using the original content. The final title and thumbnail should also reflect what the video actually contains.
Make Sure Your Reaction Is Easy to See and Hear
Watch the video on both a phone and a larger screen. Your face or character should be large enough to read, while the original content should remain visible and understandable.
Check that your voice stays above the source audio and background music. Captions should not be hidden behind platform buttons, and the reaction window should not cover faces, subtitles, or other important details.
Confirm You Can Use the Original Video
Use content you created, licensed, received permission to use, or can otherwise use lawfully. Keep copies of licenses or written permission and review any attribution or commercial-use requirements.
If you are relying on fair use, document why each source segment is necessary to your commentary. Platform remix permission, copyright law, and monetization eligibility are related but separate considerations.
Optimize Your Thumbnail and Title
For the thumbnail, use a clear, high-contrast reaction face or character expression that communicates a recognizable emotion. Keep the subject of the original video visible and avoid adding too much text or too many small visual elements.
For the title, use a specific formula that gives viewers a reason to watch. Examples include:
First Time Watching [Movie or Event]
[Expert] Breaks Down [Topic]
My Honest Reaction to [Announcement]
What [Video or Event] Gets Right—and Wrong
The title and thumbnail should accurately represent the reaction in the video rather than exaggerating it for clicks.
FAQ
Can I Make a Reaction Video for Free?
Yes. You can make a basic reaction video with a phone or webcam, headphones, a microphone, free recording software, and a free video editor.
TikTok Duet and YouTube Shorts Collab can reduce the need for separate editing. Free AI and editing tools may limit export resolution, advanced features, generation credits, or watermark removal.
How Long Should a Reaction Video Be?
There is no single ideal length. A short-form reaction should introduce its main point immediately and end after the commentary has delivered its value.
A longer YouTube reaction can include more detailed analysis, humor, or expert explanation. Remove silent sections and source footage that does not provide necessary context.
Do I Need Permission to Use Someone Else’s Video?
Permission is the clearest option when using copyrighted material. Some uses may qualify as fair use in the United States, especially for commentary or criticism, but fair use depends on the specific circumstances and can ultimately be decided only by a court.
Giving credit, adding a disclaimer, or changing the footage does not create permission by itself.
Can Reaction Videos Be Monetized on YouTube?
Reaction videos can be monetized when they contain substantial original commentary, meaningful modifications, or clear educational or entertainment value. Videos built mostly from reused footage or nonverbal reactions may not satisfy YouTube’s reused-content policy.
Copyright rules still apply separately. A reaction video may add enough original value for monetization review while still receiving a copyright claim for an audio or video element.
You May Be Interested
How Much Does It Cost to Make a Movie: Traditional vs AI
How to Make a Dark Video Brighter with AI: 5 Easy Steps

How to Make a Highlight Video: AI Editing Made Simple
How to Make a TikTok Video in 2026: Complete Guide
How to Make a Short Film in 2026: From Script to Screen