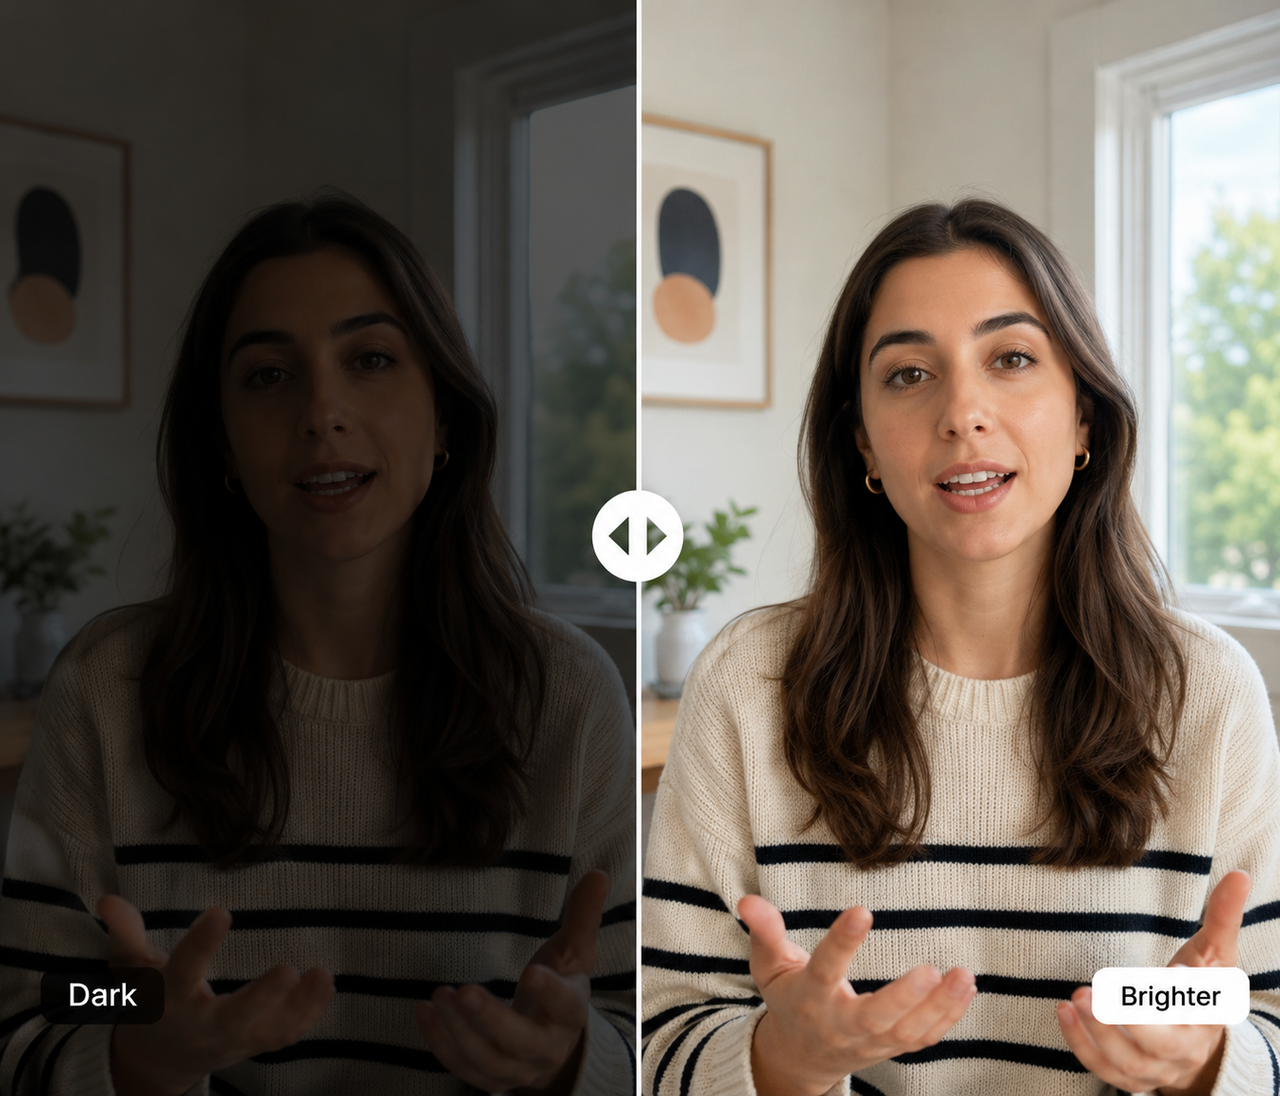
How to Edit Videos on iPhone: Tips for a Professional Finish
 RoboNeo TeamNovember 2, 2026
If you frequently need to edit video on iphone, there are several methods available ranging from the built-in Photos and iMovie apps to downloadable professional tools like CapCut or AI-powered platforms like RoboNeo. We will introduce these common tools to teach you the entire process of how do you edit a video on an iphone while also covering the basics of how to edit a video effectively.
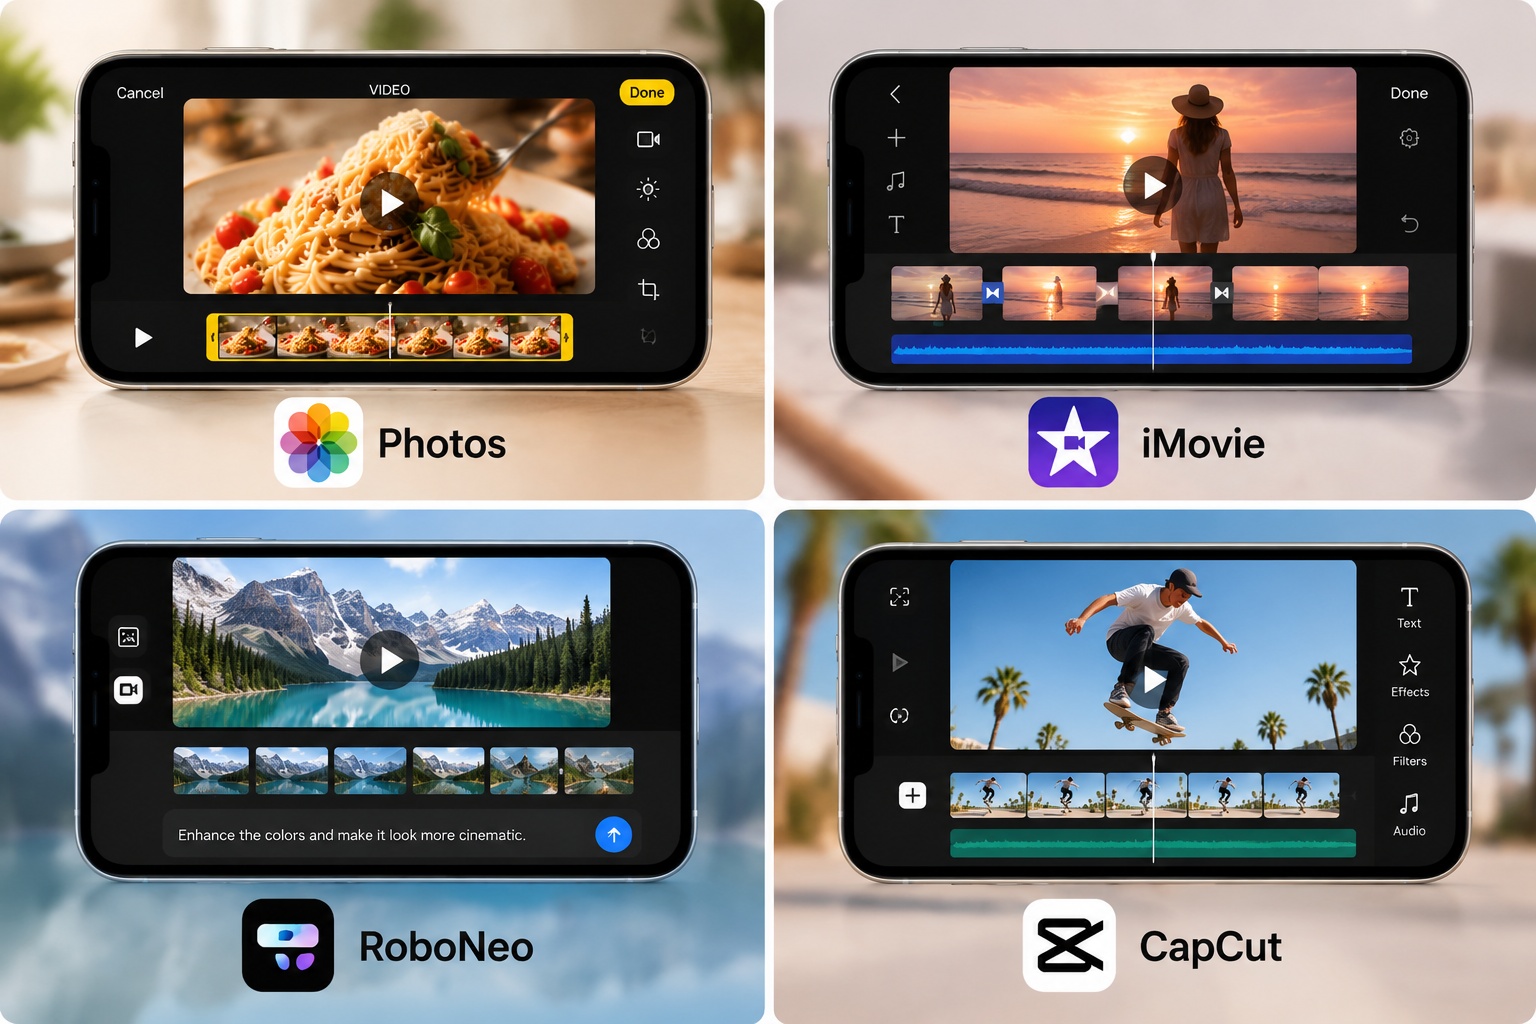
What Are the Best Tools for Editing Videos on iPhone?
To help you quickly find the right fit for your needs, we have organized the specific features and suitable use cases for these tools.
| Tool | Key Features | Best For | Limitations |
| Photos | Trim, crop, rotate, adjust colors, and apply filters | Basic video editing | No multi-track editing or background music tools |
| iMovie | Combine clips, add music, titles, and transitions | Complete video editing | Limited advanced effects and customization |
| CapCut | Multi-track editing, captions, and effects | Social media videos | Some advanced features require a paid subscription |
| RoboNeo | AI-powered video editing and visual adjustments | AI-assisted video creation | Less control over precise timeline editing |
How to Edit Videos Using the iPhone Photos App
The built-in Photos app on your iPhone enables basic video editing functions such as trimming, rotating, color grading, muting, and speed adjustment, and certain newer iPhone models even support Audio Mix. Here is the step-by-step guide on editing videos on the iPhone using these built-in features.
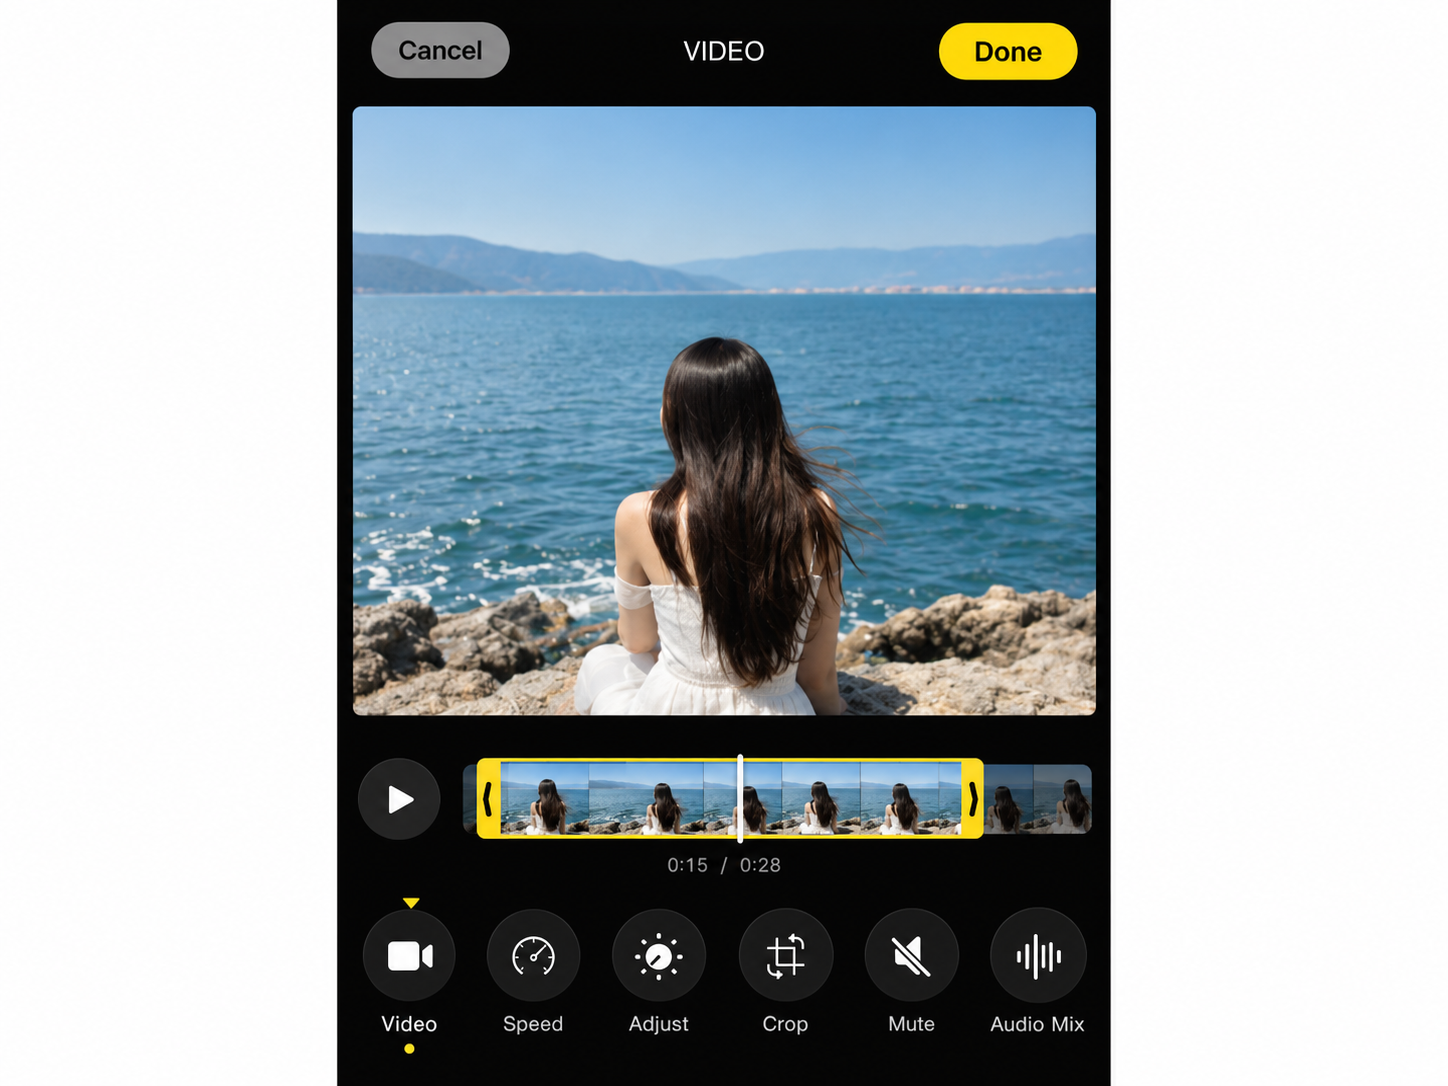
Step 1: Open Your Video in the Photos App
In order to begin, you should open the Photos app on your iPhone and find the video you wish to edit, after which you can tap the video to enter the preview page and tap Edit to access the video editing interface.
Step 2: Trim Your Video
Within the timeline below the video, dragging the control handles on the left and right ends allows you to adjust the start and end positions to delete unwanted parts, and tapping Play will let you preview the trimming effect.
Step 3: Adjust Video Speed and Slow Motion
Clicking the Playback Speed button allows you to choose an appropriate speed, and for videos recorded in Slo-mo mode, you can drag the control bar below the timeline to adjust the slow-motion start and end points, though certain features require specific formats and system versions.
Step 4: Crop and Rotate Your Video
Tapping Crop allows you to drag the cropping frame to adjust the image area and select aspect ratios like 9:16 or 16:9, and if the orientation is wrong, you can use the Rotate tool to fix it.
Step 5: Adjust Colors and Add Filters
Tap Adjust to fine-tune exposure, brightness, contrast, and saturation. You can also use filters to change the overall look of your footage. If your clips still appear too dark, blurry, or washed out, these tips on how to improve video quality can help you identify and fix common visual problems.
Step 6: Mute Audio or Use Audio Mix
If the original sound is unnecessary, tapping the speaker icon mutes it, and for spatial audio videos recorded on supported devices, using Audio Mix allows you to select modes like Studio, In-Frame, or Cinematic to adjust vocal and background sound performance.
Step 7: Save Your Edited Video
Once editing is complete, tapping Done saves the changes, and if you only trimmed the video, you can select Save Video or Save Video as New Clip based on the provided options.
Optional Tip: Copy Edits to Other Videos
If you need to apply the same color grading or filters to multiple videos, opening an edited video and tapping More followed by Copy Edits allows you to select other videos and use Paste Edits to apply the supported parameters and reduce repetitive operations.
Note: Please keep in mind that features like playback speed adjustment and Audio Mix depend on your iPhone model, iOS version, and video format, meaning not all videos support them.
How to Edit Videos With iMovie on iPhone
In contrast to the standard Photos app, iMovie provides the ability to merge and edit multiple video clips while adding independent audio tracks, transitions, and title text, which is perfect for creating more polished videos. Here is the step-by-step process for editing videos on the iPhone using iMovie.
Step 1: Create a New Project and Import Multiple Videos
In order to start, you should open iMovie on your iPhone, tap Start New Project, and select Movie, after which you can select multiple videos or photos from your album, tap Create Movie, and merge these assets into the same project timeline.
Step 2: Trim, Split, and Arrange Video Clips
Tapping on a video clip in the timeline allows you to drag the yellow handles on both ends to adjust the duration, and using the Split tool enables you to divide the clip and delete unwanted parts, while long-pressing and dragging different clips allows you to modify their playback sequence.
Step 3: Add Transitions and Video Effects
By tapping the transition icon located between two video clips, you can select transition effects such as Dissolve or Wipe, and you can also use Filters to adjust the visual style or utilize the Speed tool to modify the playback speed.
Step 4: Add Audio Tracks and Titles
Tapping Add Media followed by Audio and Soundtracks allows you to insert background music that will be displayed on an independent track below the video, where you can adjust the volume and playback duration, and selecting a video clip and tapping Titles enables you to add and edit title text.
Step 5: Export and Save Your Video in 4K
After completing your edits, tapping Done and choosing Share followed by Share Video allows you to set the export resolution and frame rate in the Options menu, and if the project supports it, you can choose to export in 4K (3840 × 2160) before finally tapping Save Video to save it to your iPhone album.
How to Edit iPhone Videos Online With RoboNeo
RoboNeo is an AI video creation platform available on the Web, Android, and iPhone apps, and through RoboNeo Video Editing, users can upload video assets and use natural language prompts to modify visual content and adjust visual styles without needing to master complex editing skills. The following steps will walk you through the process using the web version.
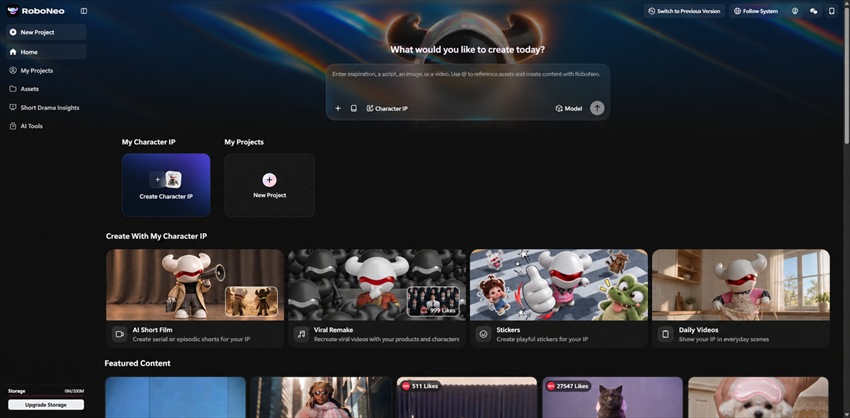
Step 1: Open RoboNeo in Your Browser
Access the RoboNeo AI Video Editing page in your computer browser, click to start creating, log into your account, and enter the AI video creation workspace.
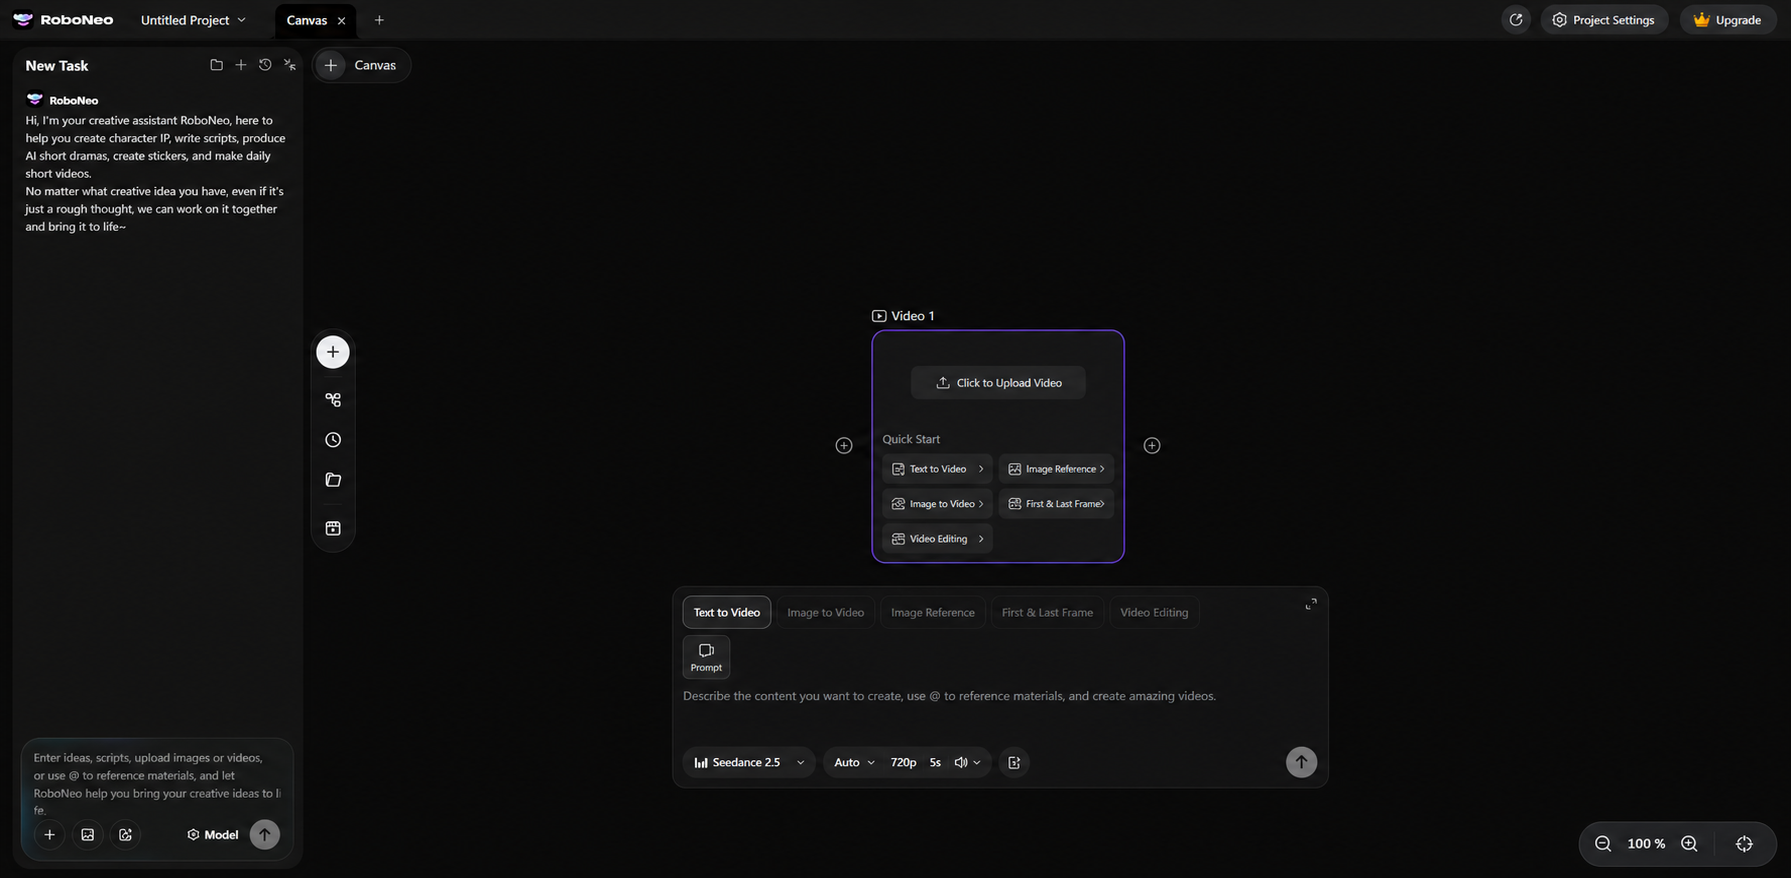
Step 2: Upload Your Video
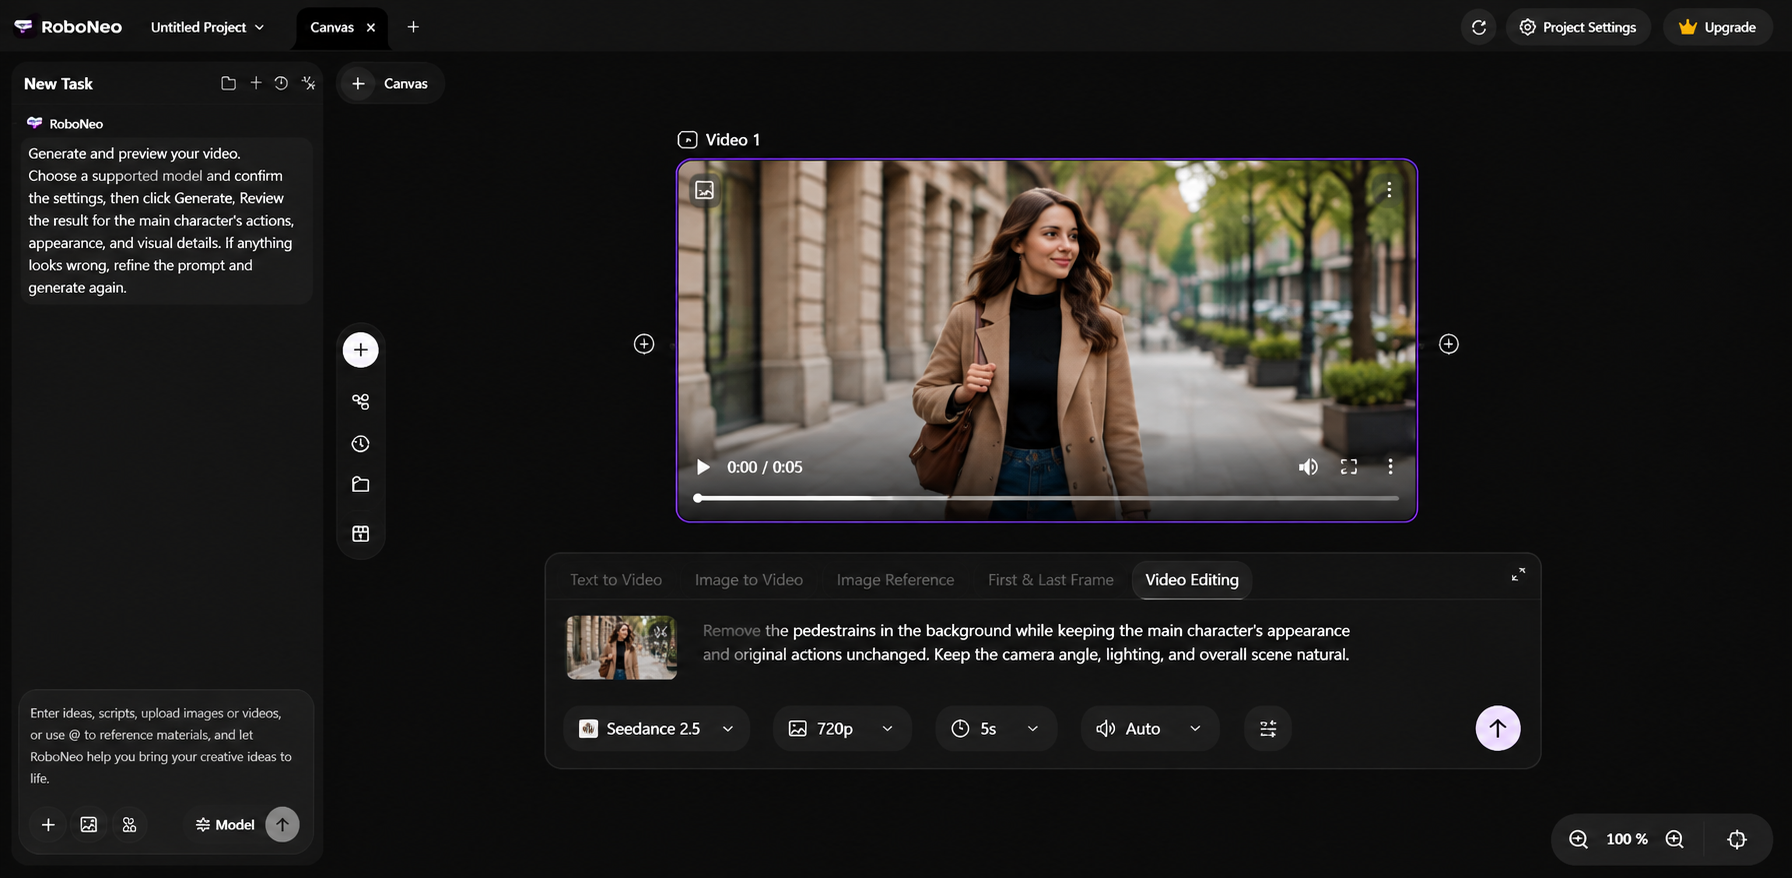
Add a Video Node in the workspace and upload the video assets you need to process based on your selected model and editing mode, and these videos can serve as reference materials to retain original actions, adjust visual styles, or modify specific elements.
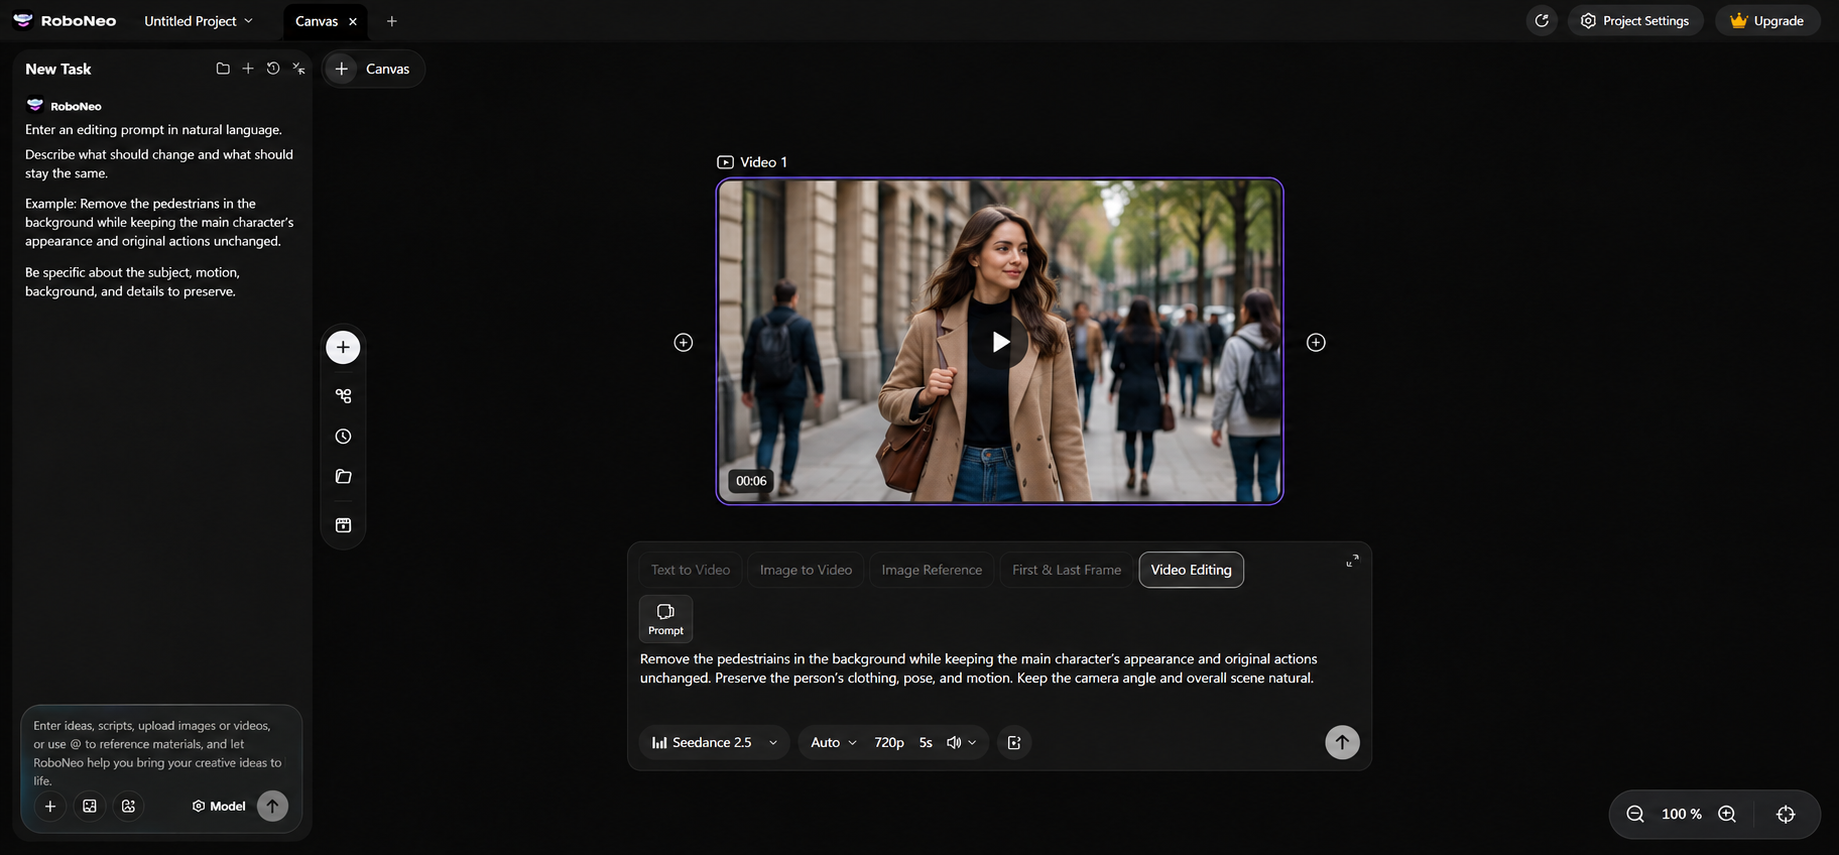
Step 3: Enter Your Editing Prompt
Enter a natural language prompt to describe the video content you wish to modify, such as "remove the pedestrians in the background while keeping the appearance and original actions of the main character," and try to clearly specify the details that need to be changed and retained so the AI can understand your editing needs more accurately.
Step 4: Generate and Preview Your Video
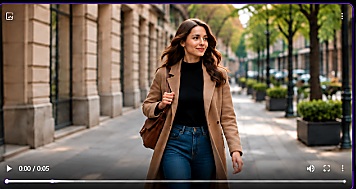
Select an AI model that supports your required editing method and click Generate after confirming the relevant settings, then preview the processed result to check the character actions, visual details, and visual effects, and if it does not meet your expectations, you can adjust the prompt and regenerate.
Step 5: Download Your Edited Video
Once you confirm the video's visual performance, download the edited video and check the resolution, aspect ratio, and audio effects according to the publishing requirements of platforms like TikTok, Instagram Reels, or YouTube Shorts.
In addition to the web version, RoboNeo also provides a mobile app, and if you prefer to learn how to edit a video on an iphone by creating directly on your device, you can download RoboNeo from the App Store to engage in AI video creation and editing at any time.
How to Edit Videos With CapCut on iPhone
As a professional editing tool, CapCut supports almost all editing operations, though some advanced features require a fee, and the following will briefly introduce the editing steps for how to edit a video on iPhone using CapCut.
Step 1: Create a New Project and Import Videos
Opening CapCut on your iPhone and tapping New Project allows you to select the videos or photos you need to edit from your album, after which you can tap Add to import the assets into the timeline.
Step 2: Trim and Arrange Video Clips
Long-pressing and dragging the video clips allows you to adjust the playback order, and dragging the ends of a clip can shorten the video duration, while using the Split tool enables you to divide the clip and delete unwanted footage or pauses.
Step 3: Add Transitions and Video Effects
Tapping the transition icon between two video clips allows you to select an appropriate transition effect, and you can also adjust the video's visual style through filters and Effects.
Step 4: Add Music, Text, and Captions
Adding background music or sound effects and adjusting the volume is done through audio, and using text allows you to add titles and descriptive text, while you can also generate captions through Auto Captions.
Step 5: Export and Save Your Video
Once you've finished editing, tap the resolution option in the upper-right corner and choose your preferred export quality, such as 1080p. If you're creating content for TikTok, check these high-quality TikTok video upload settings to choose the right resolution, aspect ratio, and frame rate. Then tap Export to save the video to your iPhone.
Tips for Editing Videos on iPhone
Regardless of whether you use Photos, iMovie, CapCut, or AI video editing tools, mastering some basic editing techniques is essential for making your videos smoother and clearer, especially when you want to understand how to edit a video effectively. The following seven suggestions will help you improve your editing results and reduce unnecessary repetitive editing work.
Remove Dead Air and Unnecessary Pauses: Removing dead air, repetitive expressions, and unnecessary shots makes the content more compact, which significantly improves the overall viewing experience.
Keep Colors Consistent Across Clips: For multi-clip videos with distinct color gaps, adjust the brightness, white balance, and saturation across clips. This prevents obvious color shifts during transitions and maintains a consistent visual style.
Keep Voiceovers Louder Than Background Music: When adding background music, keep dialogue and voiceovers clear by lowering the music volume during important moments. If your recording also contains unwanted sounds like wind, traffic, or background hum, you can remove background noise from video to make your audio easier to hear.
Set the Aspect Ratio Before Editing: Pick your publishing platform first and shoot in its recommended ratio. For TikTok, Instagram Reels, or YouTube Shorts, it's best to use 9:16 so you don't have to crop it later.
Make Captions Easy to Read: Use clear fonts and proper sizes with strong background contrast. Keep text within the safe zone and ensure it doesn't block key visuals.
Avoid Overusing Transitions: Use transitions moderately and prioritize straight cuts or simple fades to keep the audience focused on the actual video content.
Match the Export Frame Rate to Your Footage: Choose your export frame rate based on the source footage and publishing needs. For example, keep 30 FPS footage at 30 FPS, and retain 60 FPS for smooth action to avoid unnecessary frame rate conversions.
FAQ
Can you edit 4K videos on an iPhone?
iPhones support editing 4K videos, allowing you to use the built-in iMovie for trimming, color grading, or more complex editing tasks. According to Apple's official documentation, iMovie supports both editing and exporting in 4K.
Can you edit videos on an iPhone without an internet connection?
With the built-in Photos app or iMovie on iPhone, you can perform offline editing as long as your video assets and required resources are saved locally on the device.
Why do iPhone HDR videos look different after editing?
This usually comes down to how editing software handles HDR (High Dynamic Range). If the software doesn't support HDR or exports the video as SDR (Standard Dynamic Range), the image can look gray, too bright, or lose its color accuracy. To avoid this, choose tools that support HDR and check your export settings, like enabling the HDR option in iMovie to keep the effect.
Why does my iPhone lag or overheat when editing videos?
This usually happens because video editing demands heavy CPU and GPU resources, especially for 4K video, HDR footage, or complex effects. Low storage, too many background apps, and long editing sessions can also slow down your device.
Why can't I import certain videos into an iPhone video editor?
This could be due to incompatible formats, corrupted files, missing photo access, or low storage. Check if the video plays properly first and ensure the editor has photo library permissions.
You May Be Interested

How to Add a Background to a Photo: 4 Methods Compared
How to Blur Background in Video: Easy Methods for 2026

How to Brighten a Dark Picture Without Washing It Out

How to Create Animated Videos: 5 AI Methods to Final Video
How to Fix Grainy Photos: Reduce Noise and Improve Quality